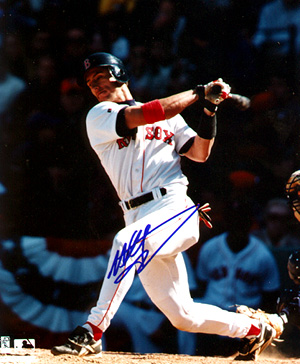
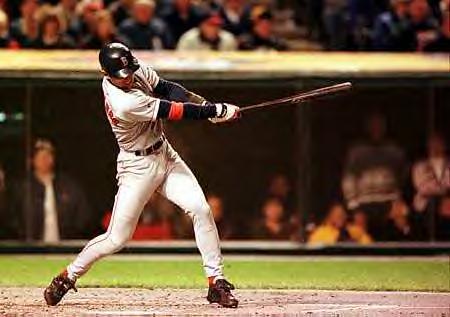
For years racquetball instructors have been telling students that they should hit a racquetball using the same stroke as a baseball player. However, there still seems to be a lot of tennis in most players' racquetball strokes. I decided to apply the baseball analogy as completely as possible in teaching racquetball and eliminating all references to tennis or any other sport. To start, I visited Jim Farr, the baseball coach at the College of William and Mary. He gave me a short course on how to hit a baseball. I then went to the library and found a number of books on batting. This is what I have been able to translate from baseball to racquetball.
Forehand.
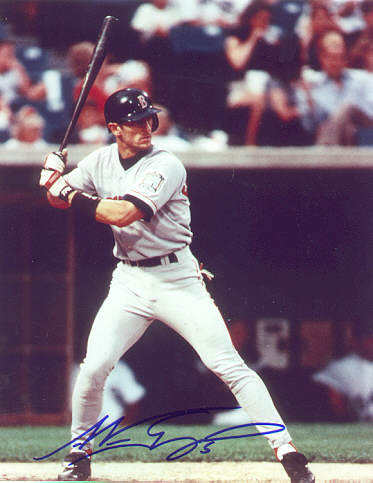
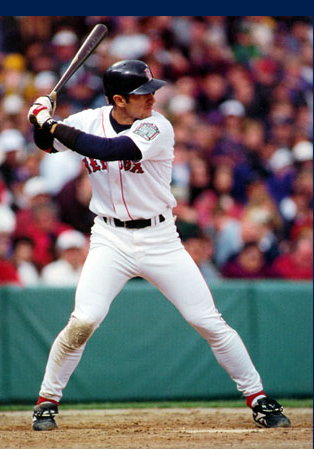
For simplicity, I will assume that you are right handed. Now, pretend that you are a batter. Grab the racquet in both hands, like a baseball bat. Pretend that the pitcher is the front wall and you are standing at home plate. Note that the first thing most people do is turn sideways to the front wall. This is important. You must be facing the side wall to hit a racquetball properly.
Now that you are facing the side wall, take a few practice swings with your pretend baseball bat. Look at your hands. They should be in a palm up/palm down position. The racquet should be gripped loosely in your fingers rather than up in your palm.
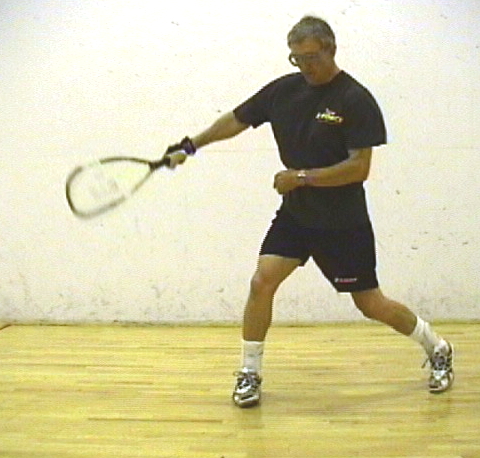
Assume the ready position as if you are waiting for the pitch. Your wrists are cocked and your right elbow is up and away from your body. Take one, super slow, practice swing. Note that as you begin your swing, the butt of the racquet faces the front wall. This is critical. Many racquetball players snap their wrists too soon and lose power.
Now, complete your swing, snapping your wrists and following through. Note that your swing is level throughout, including the follow through.
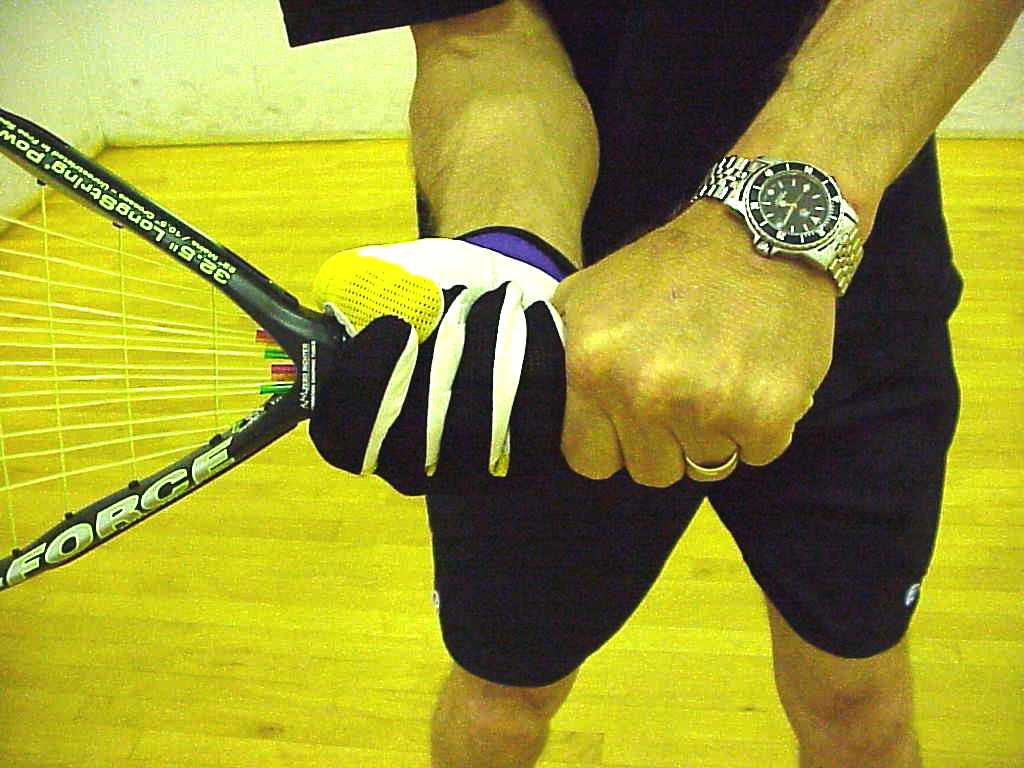
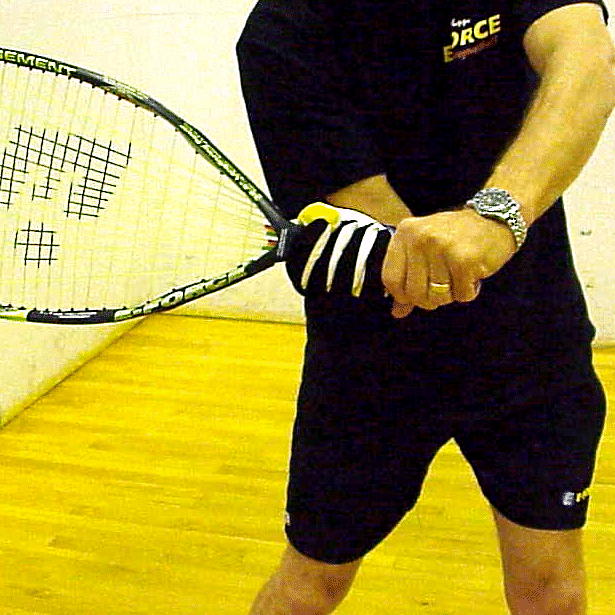
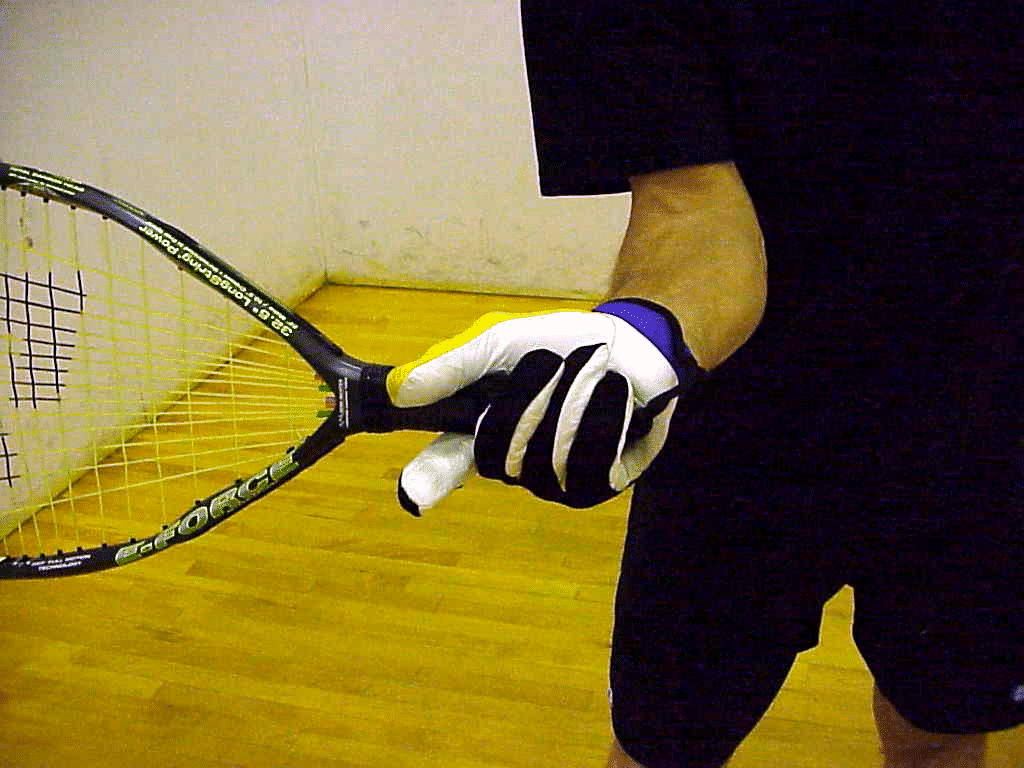
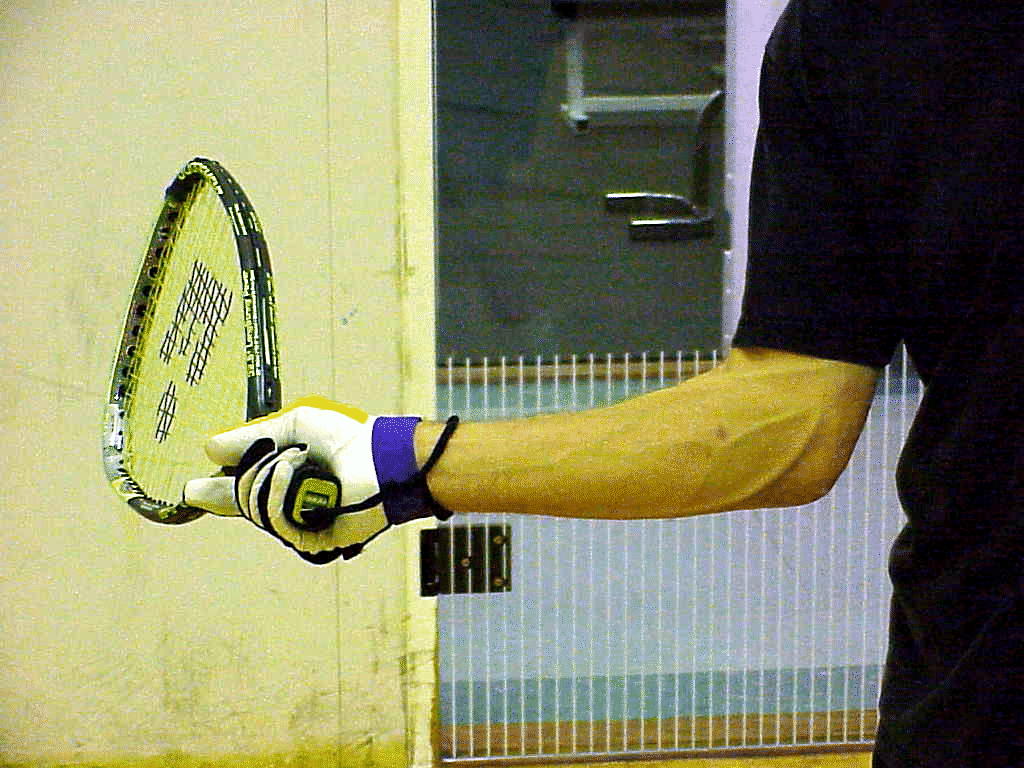
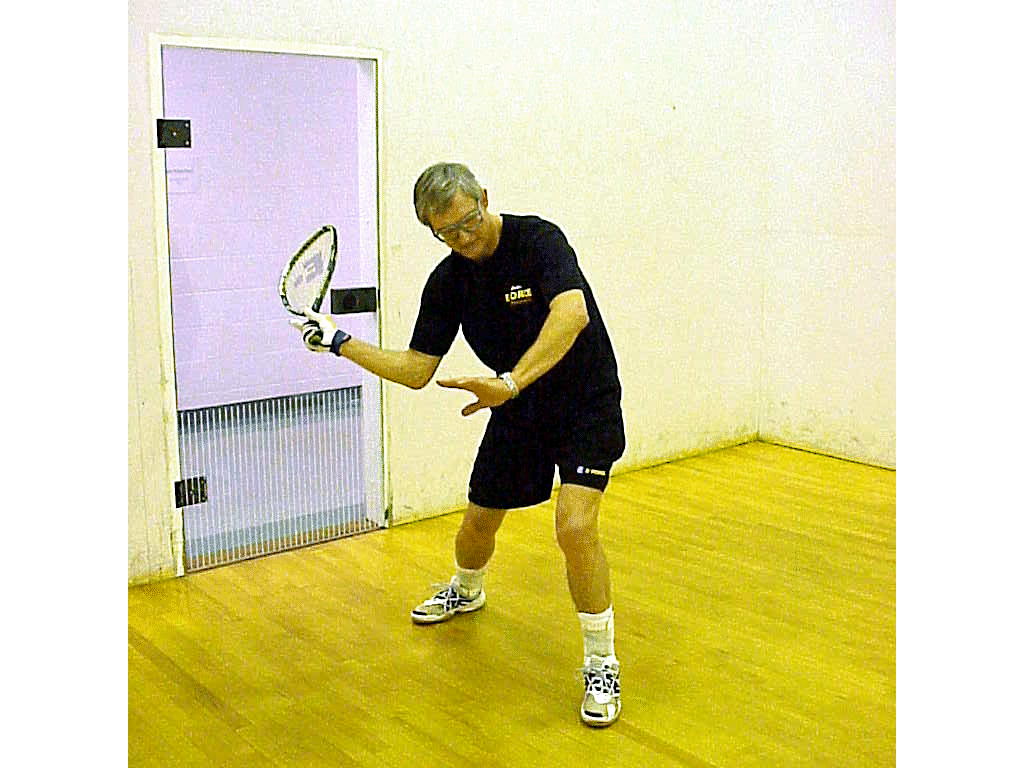
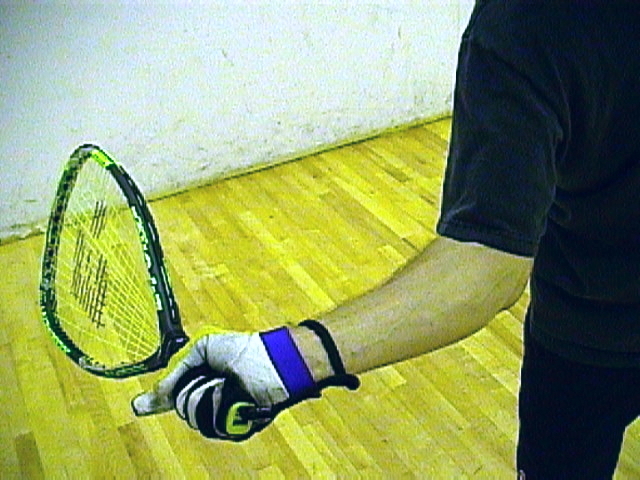
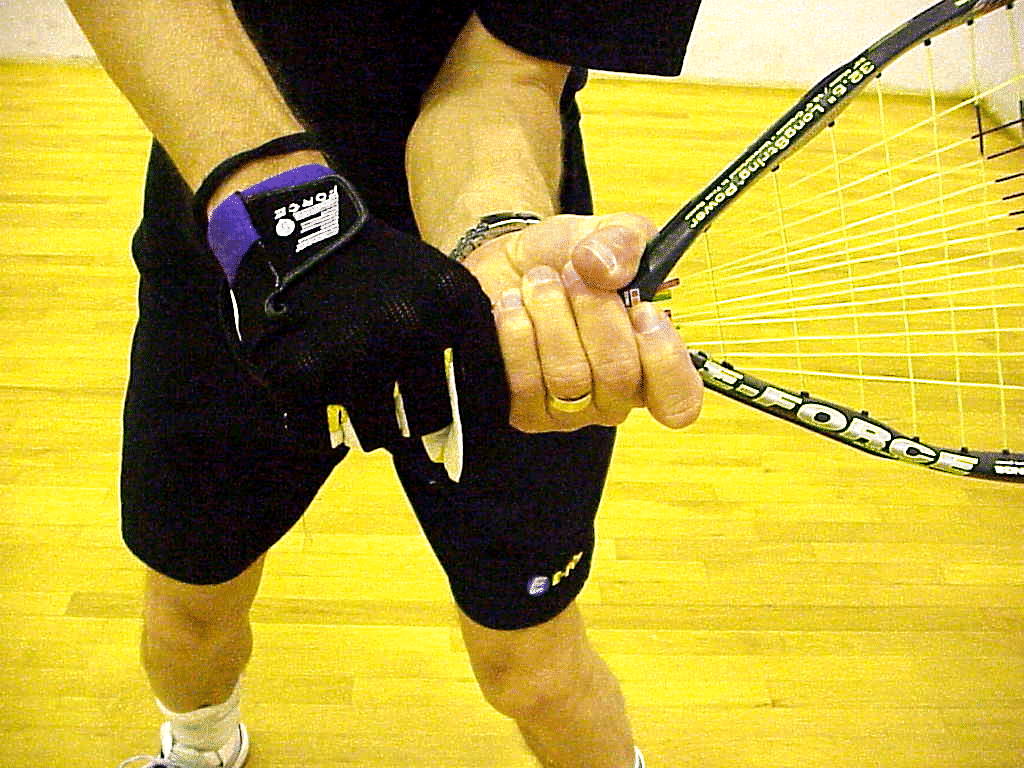
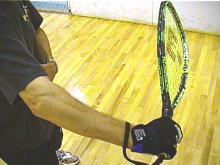
You now know how to hit a racquetball like a baseball. However, I don't recommend the two-handed forehand. So, take one more super slow practice swing and stop when your forearm is horizontal and the butt of the racquet is facing the front wall. Remove your left hand from the racquet and slide your right hand down until the handle of the racquet just disappears into your hand. (Don't go so far so that your pinky is off the racquet.) You should be able to see the fingernails on your right hand (through your glove if you are wearing one). Extend your index (trigger) finger slightly. Also, extend the thumb so that it is contacting the side of the racquet handle. Your thumb should be just above your middle finger. Don’t put the thumb on the back of the racquet.
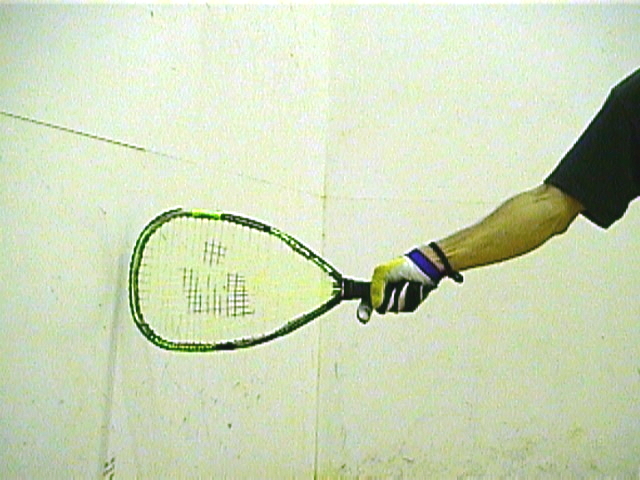
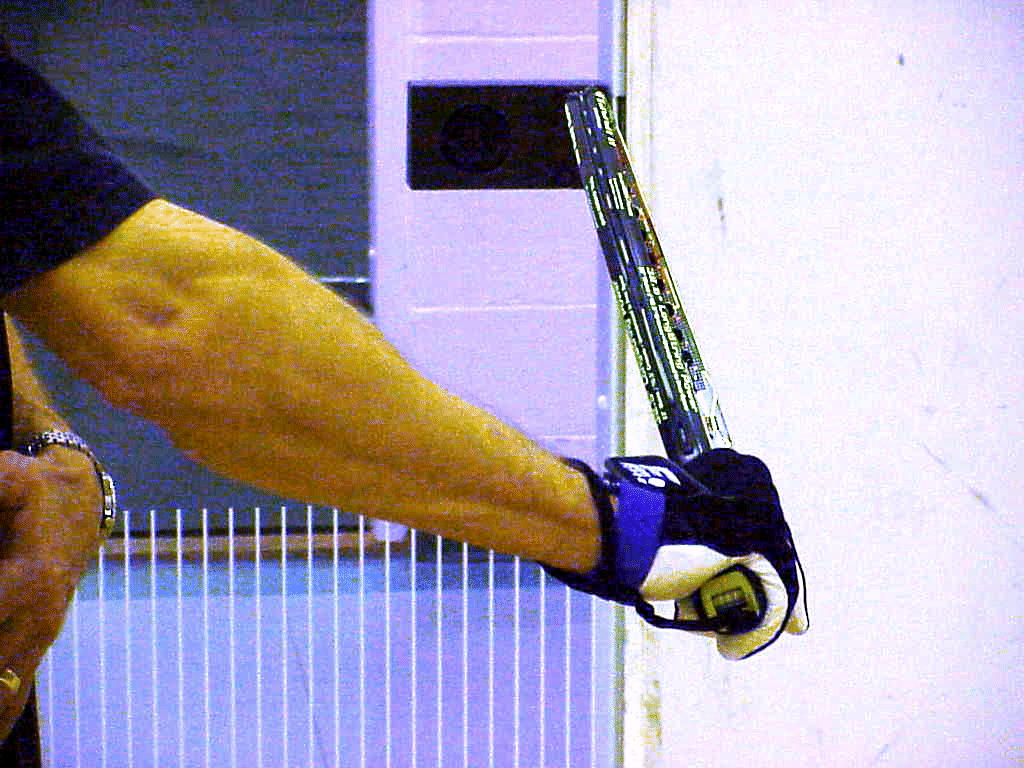
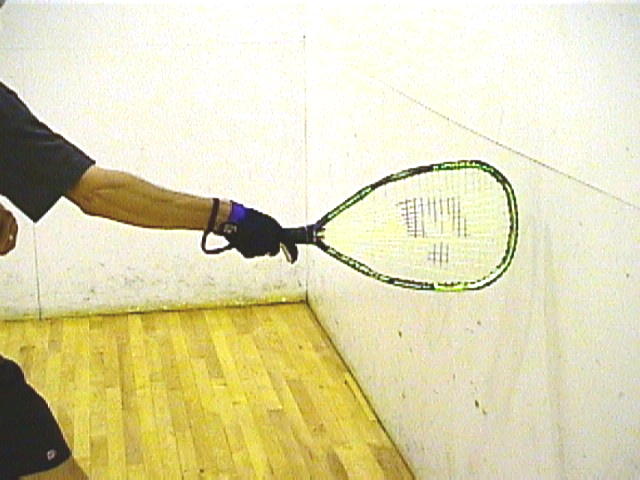
Rotate the racquet until it is tilted slightly forward at the top (about an inch or so from truly parallel). Now extend your elbow and snap your wrist so that the racquet is pointing at the side wall. This is how the racquet meets the ball. The racquet should be perpendicular to the floor, not tilted back or forward. This is the forehand grip. Remember to keep your grip loose and relaxed.
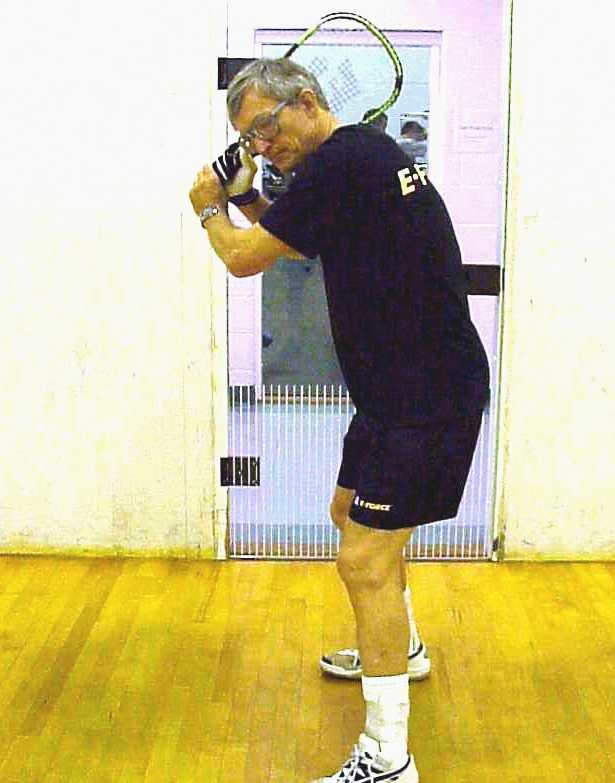
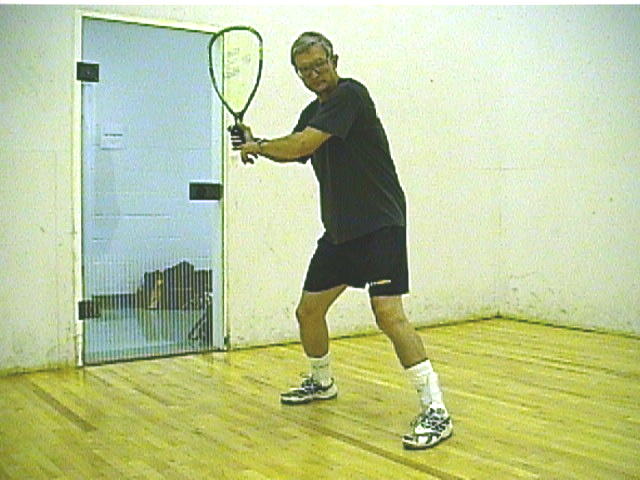
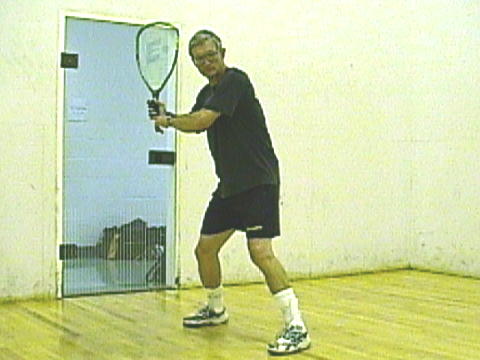
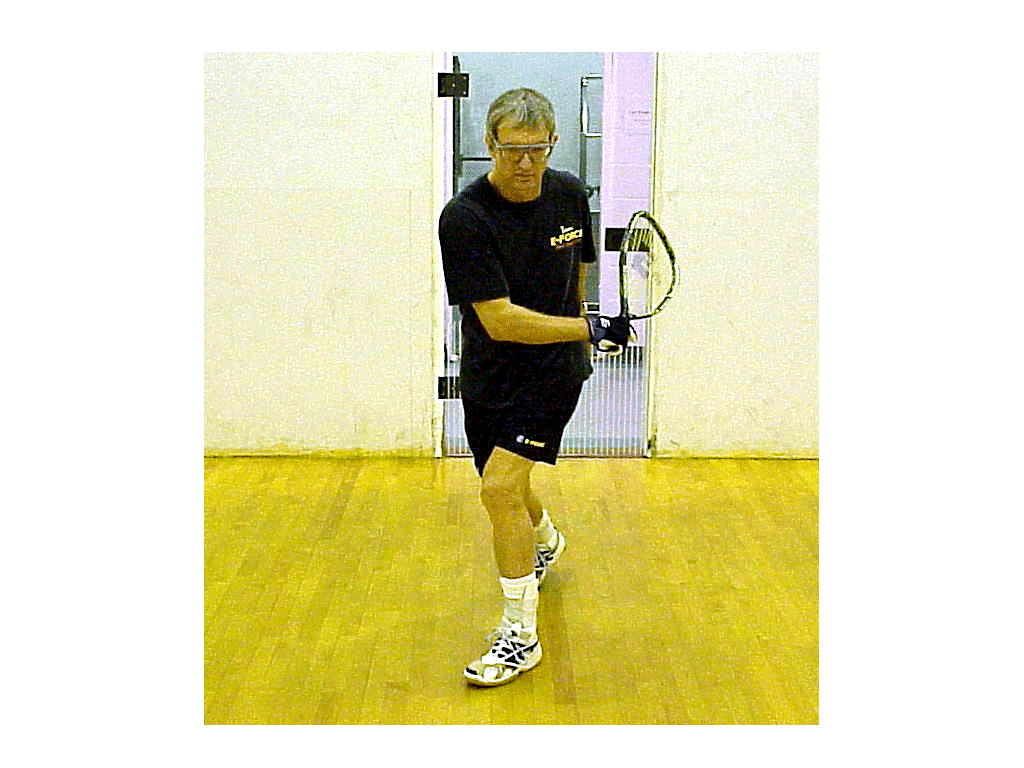
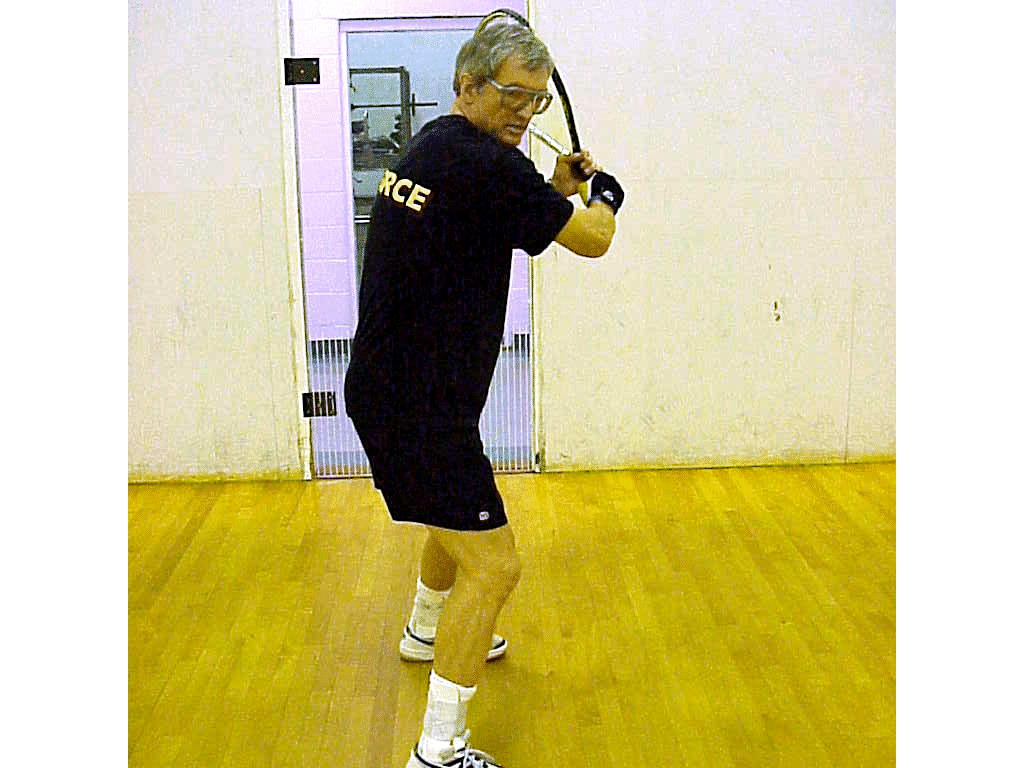
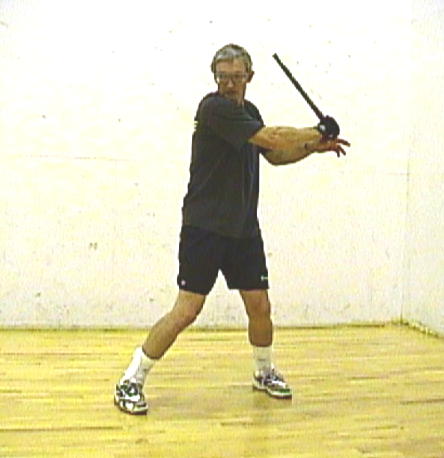
Assume the ready position again, this time with one hand on the racquet. The left hand should be just below the racquet handle, almost as if you were holding a baseball bat in two hands. Notice that your right wrist is cocked and your right elbow is up, about level with your shoulder, and away from your body. Your hands should be about chest high and back slightly behind your rear foot. Your shoulders should be level and pointed at the front wall.
Your stance should be slightly closed with your left foot in front of and a few inches closer to the side wall than the back foot. The feet should be slightly wider than shoulder width. Bend your front knee in toward your back leg. This shifts your weight back. At least 60 percent of your weight should be on the back leg. The front leg is bent in and the back leg is also bent slightly so that the knees are pinched in toward each other. Your chin should be close to, even touching, your front shoulder.
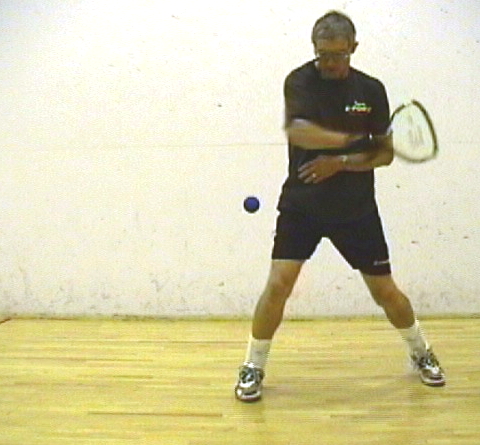
Take a short stride, approximately four inches, diagonally toward the right hand front corner. Don’t over-stride. The purpose of the stride is to transfer more weight to your back leg until you start your swing. Keep the front knee in. This keeps your weight and hands back so that you can "throw the head of the racquet at the ball." The stride should be slow and controlled. The stride should precede the swing. There should be a distinct stride phase and then a distinct swing phase.
Your hands and arms should be relaxed. The looser you grip the racquet, the more power you can transmit through it. Don’t worry about losing your grip. Your grip will tighten automatically as you contact the ball. The left forearm is parallel to the ground.
Your belt buckle and knees face the side wall until it is time to swing at the ball. The first thing that moves is your back knee, which moves forward toward your front knee as you push off your back foot. Your back foot pivots on the ball of the foot and the heel of the foot is off the ground When this happens, you will notice that your hips have started to rotate and your elbow is lower, even though you haven't moved your arm. Continue the rotation of your hips, then your torso, and finally your shoulders.
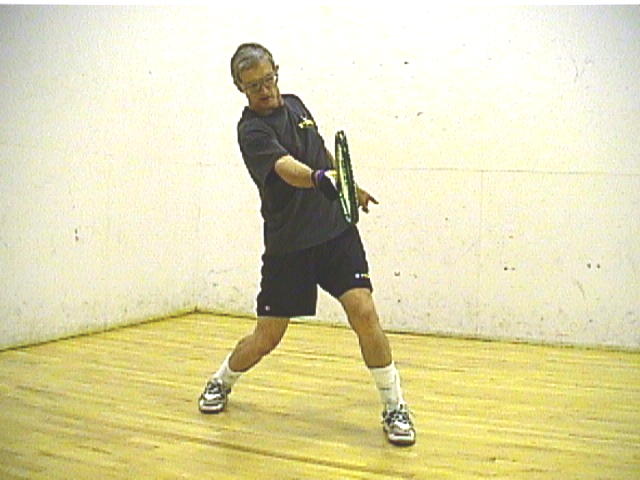
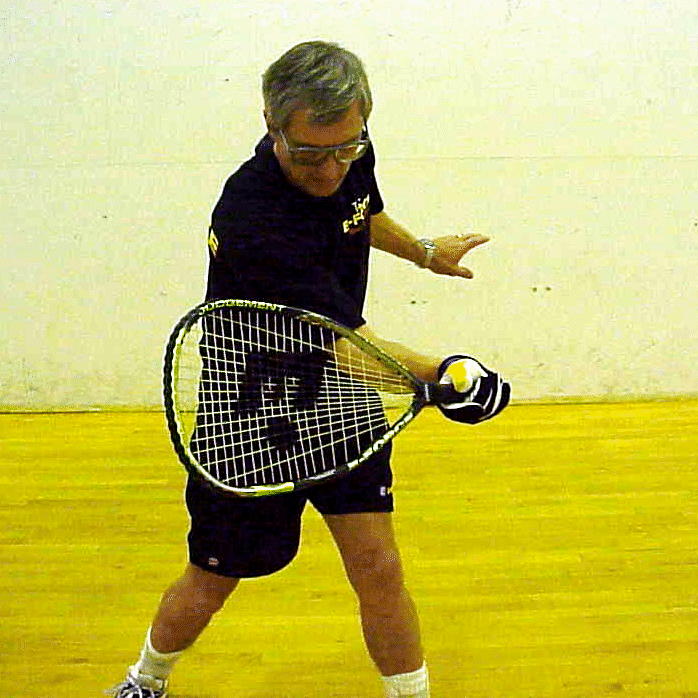
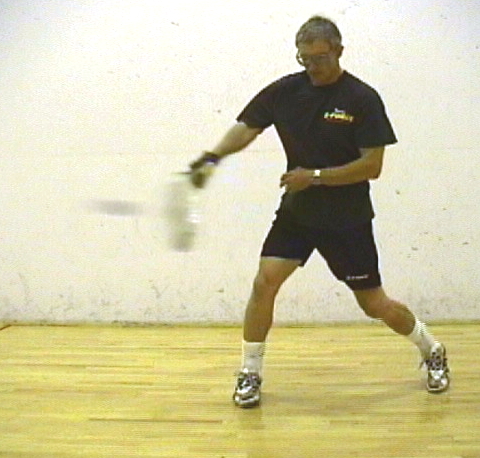
The butt of the racquet leads. The racquet, forearm and upper arm form a "U." Your left arm acts as if you are pushing someone out of the way. Your right arm extends, the wrist snaps, the ball is contacted, and the racquet follows through. Be sure that you extend your arm just before you snap your wrist. Get your elbow away from your body. Don’t jam yourself. Make contact with the ball off the front foot. If you visually line up the butt of the racquet with the ball before you snap your wrist, the wrist snap will cause the racquet to contact the ball at the point of maximum power. When your swing is complete your knees and belt buckle are all facing the front wall. Your left arm should be behind you. Your racquet is well back on your left side, below your shoulder.
As you push off the back foot, the hips, knees, and shoulders turn toward the front wall, and the back leg pivots on the ball of the back foot. Baseball instructors say that you "squish the bug" with the back foot. The heel of the back foot is lifted off the floor.
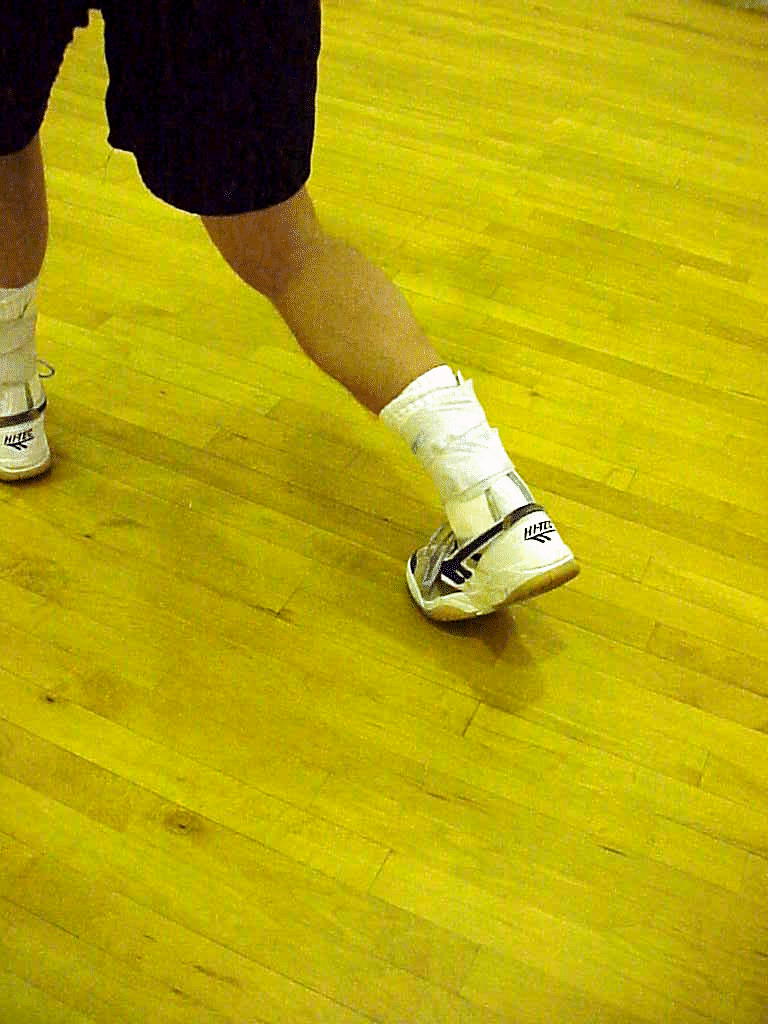
If you are dragging your back foot after making contact with the ball, you have shifted too much weight to the front foot. Keep your weight back. You should be leaning back after you have completed your swing. If you have too much weight on your front foot, drop your butt slightly, so that you put more weight on your back leg.
Keep your head still throughout the swing. You should pretend your head is in a vise and can't move. Or you are balancing a glass of water on your head and don't want to spill it. This takes discipline because the rest of your body is in motion. If you are holding your head still, you should feel the back shoulder contact your chin at the end of the swing. After you hit the ball, don't immediately follow the ball by turning your head. Instead, hold your head steady and follow the ball only with your eyes until it hits the front wall.
Notice that when the wrist snaps the motion is similar to hitting a nail sideways into a wall with a hammer. Many players snap their wrist with the palm of the hand facing the front wall in a slapping motion. This is a much less powerful wrist snap than leading with the bottom of your fist. If you are driving nails, you know you can't slap at them with the hammer. Hit the ball like you would a nail. Also, don’t snap your wrist too soon. Your hands should come forward before the head of the racquet. Remember, line up the butt of the racquet with the ball before snapping your wrist. Again, verify that the when the racquet strikes the ball that the racquet is perpendicular to the floor, so that you are not hitting over the top or slicing under the ball (that is, you are hitting the ball "flat").
Two arcs are used in the baseball swing: the wrist arc and the arm arc. The majority of the movement of the head of the racquet should be in the wrist arc, not the arm arc. You should visualize throwing the head of the racquet at the ball. Also, your muscles pull the racquet through the ball. Don’t try to push the racquet through the ball.
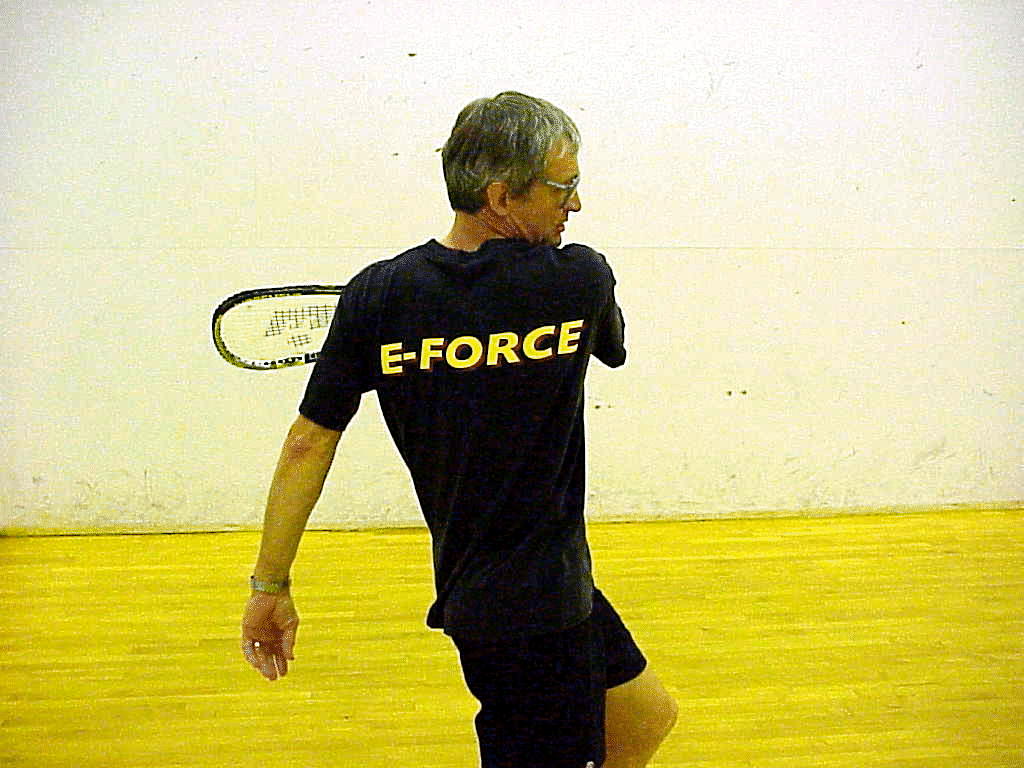
Finally, you should complete your stroke by finishing in the
defensive
ready position in which you are holding your racquet at waist level in
front of your body, facing the front wall.
Drill.
The basic racquetball drill is the drop and hit. Go to the short line on the forehand side. Stand about six feet away facing the near side wall. Drop the ball out and away from your body so that it bounces about at the midpoint of your front foot. Don’t jam yourself. Don’t throw the ball against the wall. Just drop it so it rebounds even with the front foot and hit it. Be in the ready position with your racquet up as you drop the ball. If you have trouble with the timing of the drop, just let the ball bounce more than once. Using the correct mechanics outlined above, hit the ball straight toward the front wall. If done correctly you should execute a down the line shot. Hit five good down the line shots. A good shot travels the length of the court without contacting the side wall and bounces twice before hitting the rear wall.
It is good practice to finish your stroke in the defensive ready position and relocate to good center court position. Practicing without relocating to center court encourages "admiring your shot," a bad habit in which you wait to see what your shot did before relocating. If you admire your shots in a match, you will lose rallies by reacting too late.
Now drop the ball a few inches forward, more toward the toes of the front foot. Hit five good cross court passes which go to the backhand corner, bouncing twice before hitting the rear wall.
Finally, drop the ball a little further back, toward the heel of your front foot. Hit five good pinches. A good pinch shot contacts the near side wall within five feet of the front wall, then the front wall, and bounces twice before hitting the other side wall. The secret to hitting a good pinch is to wait until the ball drops below knee level.
Go to the dotted line and repeat. Go to the halfway point between the rear wall and the dotted line and repeat. Finally, go to deep court, just in front of the back wall and repeat once more, except that you shouldn't practice pinch shots from deep court because you shouldn't hit pinch shots from deep court (very low percentage).
The more you practice the better you get. Practice more, play less, play better.
Power.
Once you have practiced the forehand you can concentrate on increasing your power. Power comes primarily from bat speed. To increase your power, be sure to keep your stance closed, push forward off your back foot, and snap your hips, shoulders, arms and wrist, don’t simply turn. Also, keep your grip loose, your arm relaxed, and extend your arm so that you can transmit all the motion into a whipping action. Line up the butt of the racquet with the ball, then throw the head of the racquet at the ball. Also, keep the stride and swing separate and distinct. Slow stride, quick racquet. Finally, keep your butt low so that your weight is back.
Control.
You can increase the amount of control you have on the placement of
the ball by pointing the butt of the racquet toward where you want the
ball to go. The longer you keep your eye on the ball, the more control
you will have over your shots. Visualize hitting the ball with the face
of the racquet pointed toward where you want the ball to go.
Backhand.
Now you are batting lefty. Again, grab the racquet in two hands as if it was a baseball bat. Pretend the pitcher is the front wall and you are at home plate. You should automatically turn sideways and face the backhand side wall.
Take a few practice swings as if you are getting ready for the pitch. Take one super slow swing and note that when your forearm is horizontal, the butt of the racquet faces the front wall. On the backhand stroke, many players never get the butt of the racquet pointed toward the front wall. Freeze your super slow stroke with the racquet butt facing the font wall. Look at your hands. They should again be in a palm up, palm down position.
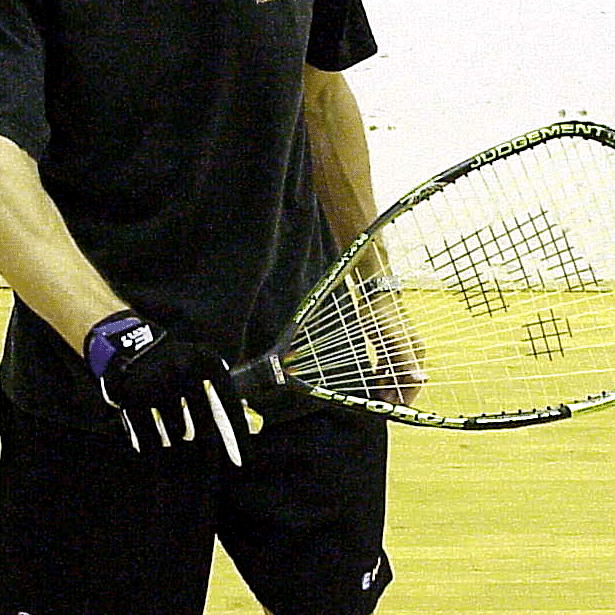
Now take your left hand off the racquet. Extend your trigger finger slightly and also extend your thumb slightly, just as in the forehand grip. Note that if you look at your right hand, all you can see is the back. You should be able to read the name brand of your glove. Now rotate the racquet so that the top is tilted slightly forward (an inch or so from perpendicular)parallel to the side wall when your forearm is parallel to the floor. Again, the racquet should not be exactly parallel to the side wall, but tilted slightly (two to four inches) toward you. Note that your wrist is cocked back slightly (exactly the same as it was in the forehand, but now the palm is down).
To make sure that you have the right grip, extend your elbow, snap your wrist so that the racquet is pointing at the side wall. The racquet should be perpendicular to the floor, not tilted up or down. This is how the racquet meets the ball.
The rest of the swing is almost a mirror image of the forehand. The only reason that it is not a complete mirror image is that you have only one hand on the racquet. The ready position is almost the same. The right elbow is again up, approximately shoulder high, and away from the body. However it is the lead elbow now. Put the left hand under your right hand in the ready position, similar to the baseball player waiting for a pitch.
This helps keep the racquet up, however, as you swing, the left arm must drop and be kept close to the body, as if you are hugging yourself.
The knees are pinched in and the weight is back so that at least 60 percent of your weight is on the back leg. Your stance should be slightly closed with the front foot a few inches closer to the side wall than the rear foot. Your shoulders should be level. You should feel your chin touching your front shoulder.
Take a small, four-inch step diagonally toward the front left-hand corner. Keep the stride phase and the swing phase separate and distinct. Slow stride, quick racquet. As you begin the swing, you push off the rear foot, forcing your back knee forward. Your rear foot twists on the ball of the foot as you "squish the bug." This starts the hip rotation, which leads to rotation of the torso and eventually the shoulders. Note that the racquet, arm and chest form a "U," similar to the forehand.
Utilize your hips, abdominal muscles, and shoulders to pull the
racquet
through the ball. Extend your arm and snap your wrist just before
contacting
the ball. Keep your elbow away from your body. The knees and belt
buckle
start facing the side wall and end up facing the front wall. Keep your
arm, wrist, and grip loose so that the maximum power is transmitted to
the racquet head. Keep the swing flat and level. Keep your weight
back.


As in the forehand, line up the butt of the racquet with the ball. Aim the butt of the racquet toward where you want the ball to go.
Note that in the baseball swing, the front hand guides the bat while the top hand does most of the snapping. Since you are now batting lefty and one-handed, the only hand you have on the racquet is the front, or guiding hand. Therefore, you cannot generate as strong a wrist snap on the backhand side. This is one reason that the backhand tends to be weaker than the forehand. The other reason is that most of us are not switch hitters and are not used to hitting from the "wrong" side.
Just as in the forehand, you want to contact the ball off the front foot. By lining up the ball and the butt of the racquet, you keep the head of the racquet back to maximize power. Keep your arm and hand nicely relaxed and snap your wrist as much as possible as you contact the ball. Keep the grip loose and throw the head of the racquet at the ball. The result should be a backhand that is only slightly less powerful than the forehand.
Once you have made contact with the ball, continue the swing, following through level so that the racquet finishes up behind you, below shoulder level. Keep your head still. Because your left hand is down, you won't feel your back shoulder brush against your chin, however, if your head is still, your chin and back shoulder should be only a few inches apart as you follow through. Follow the ball with your eyes, not your head. Again, if you are dragging your back foot (which has just finished squishing the bug), you are putting too much weight on the front foot. Keep your weight back.
The power, control, and drill instructions are identical to the forehand stroke. Power comes from snapping your body, not just turning, and lining the ball up with the butt of the racquet before snapping your wrist. Also, drop your butt to keep your weight back. Control comes from pointing the butt of the racquet toward where you want the ball to go, keeping your eye on the ball as long as possible, and visualizing contacting the ball with the face of the racquet pointed toward where you want the ball to go.
Further Reading.
Here is a nice animated gif, showing Cliff Swain hitting a forehand serve, courtesy of Ed Arias at http://www.racquetballcentral.com.
Here is an excellent discussion of the physics of hitting a ball. http://carini.physics.indiana.edu/E105S99/swing.html