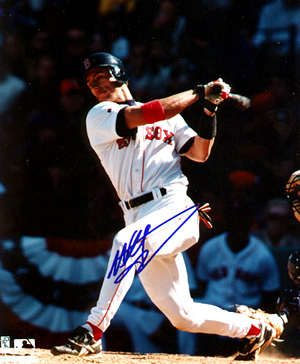
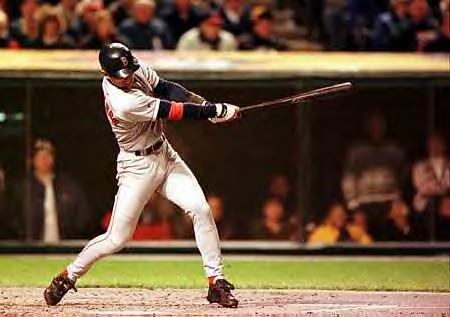
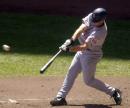
For years racquetball instructors have been telling students that they should hit a racquetball using the same stroke as a baseball player. However, there still seems to be a lot of tennis in many players' swings. I decided to apply the baseball analogy as completely as possible in teaching racquetball and eliminating all references to tennis or any other sport. To start, I visited Jim Farr, the baseball coach at the College of William and Mary. He gave me a short course on how to hit a baseball. I then went to the library and found a number of books on batting and I did a lot of research on the internet. This is what I have been able to translate from baseball to racquetball.
Forehand.
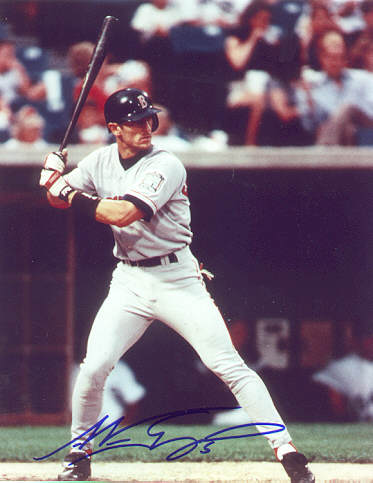
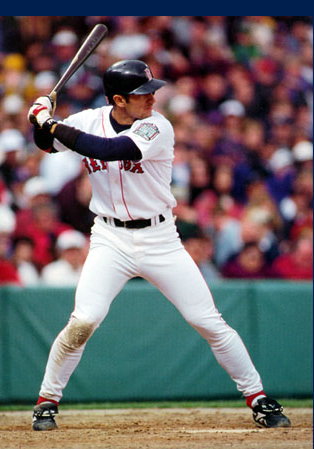
For simplicity, I will assume that you are right handed. Now, pretend that you are a batter. Grab the racquet in both hands, like a baseball bat. Pretend that the pitcher is the front wall and you are standing at home plate. Note that the first thing most people do is turn sideways to the front wall. This is important. You must be facing the side wall to hit a racquetball properly.
Now that you are facing the side wall, take a few practice swings with your pretend baseball bat. Look at your hands. They should be in a palm up/palm down position. The racquet should be gripped loosely in your fingers rather than up in your palm.
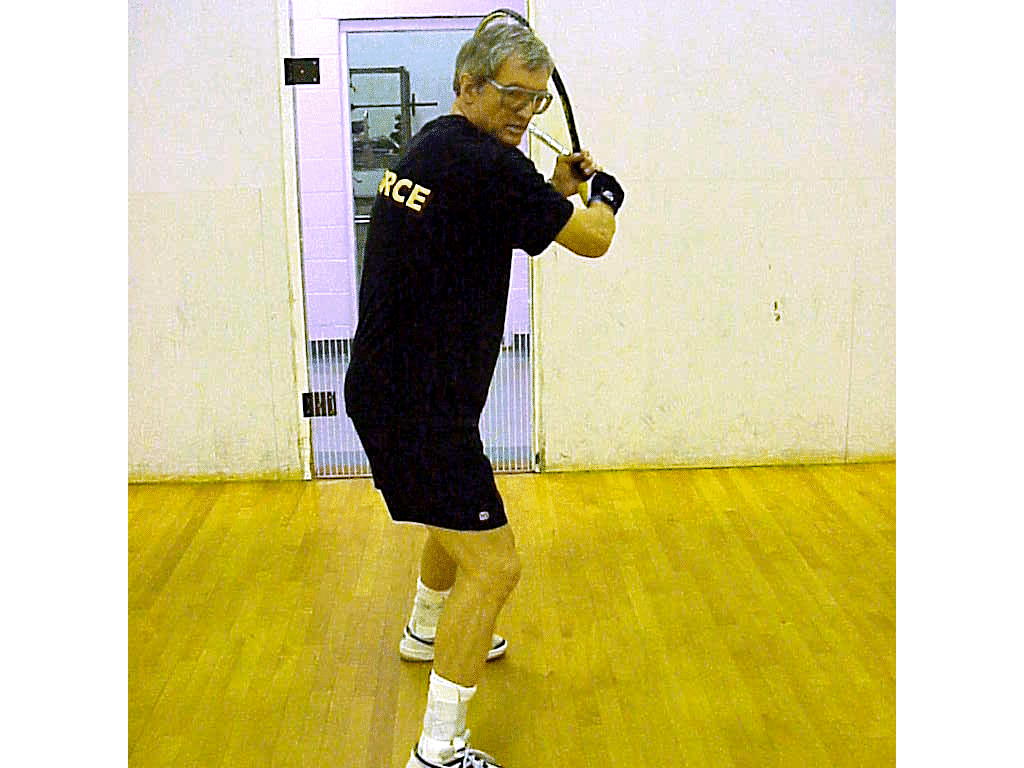
Assume the ready position as if you are waiting for the pitch. Your
wrists are cocked and your right elbow is up and away from your body.
Take
one, super slow, practice swing. Note that as you begin your swing,
your elbow leads and the
butt of the racquet faces the front wall.
Now, complete your swing, snapping your wrists and following through. Note that your swing is level throughout, including the follow through.
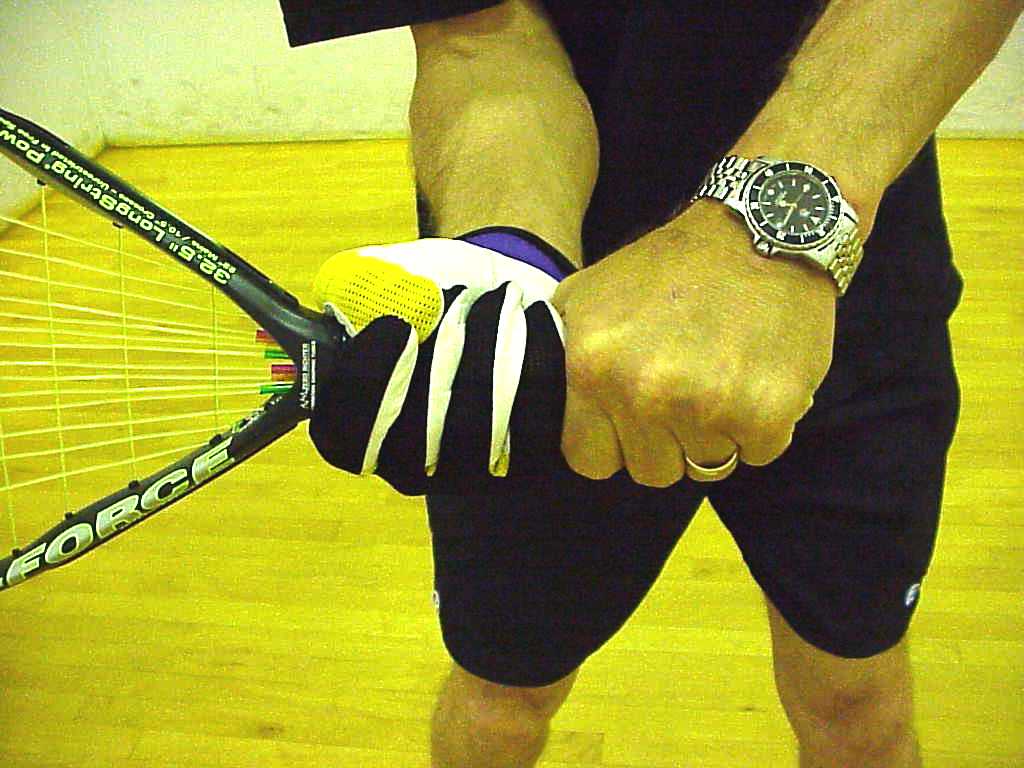
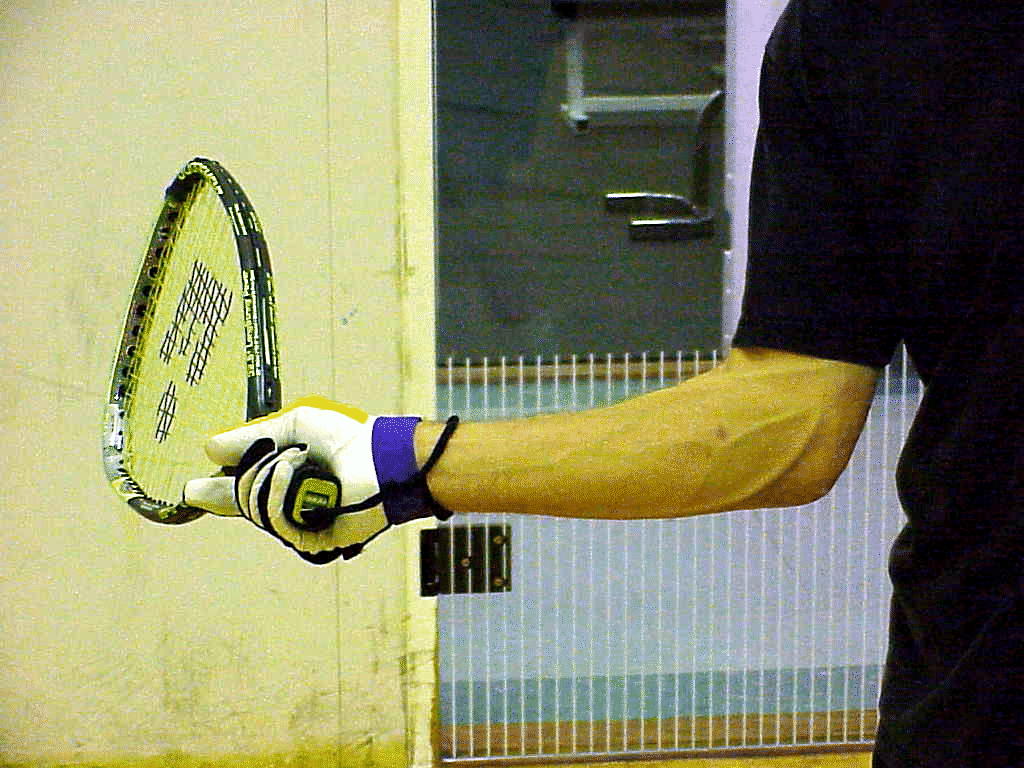
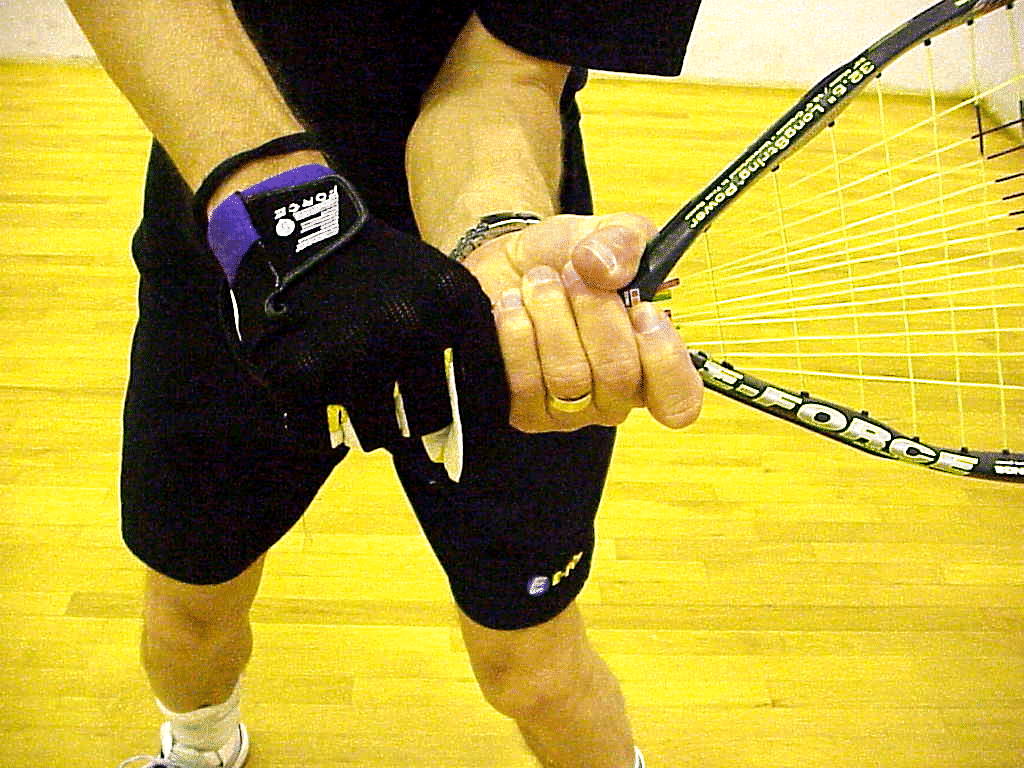
You now know how to hit a racquetball like a baseball. However, I don't recommend the two-handed forehand. So, take one more super slow practice swing and stop when your forearm is horizontal and the butt of the racquet is facing the front wall. Remove your left hand from the racquet and slide your right hand down until the handle of the racquet just disappears into your hand. (Don't go so far so that your pinky is off the racquet.) You should be able to see the fingernails on your right hand (through your glove if you are wearing one). The index (trigger) finger should be slightly extended. Also, extend the thumb so that it is contacting the racquet just below the first knuckle. Don’t put the thumb on the back of the racquet.
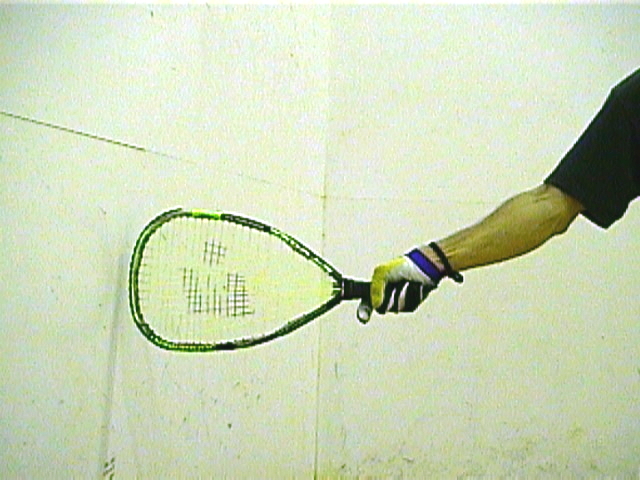
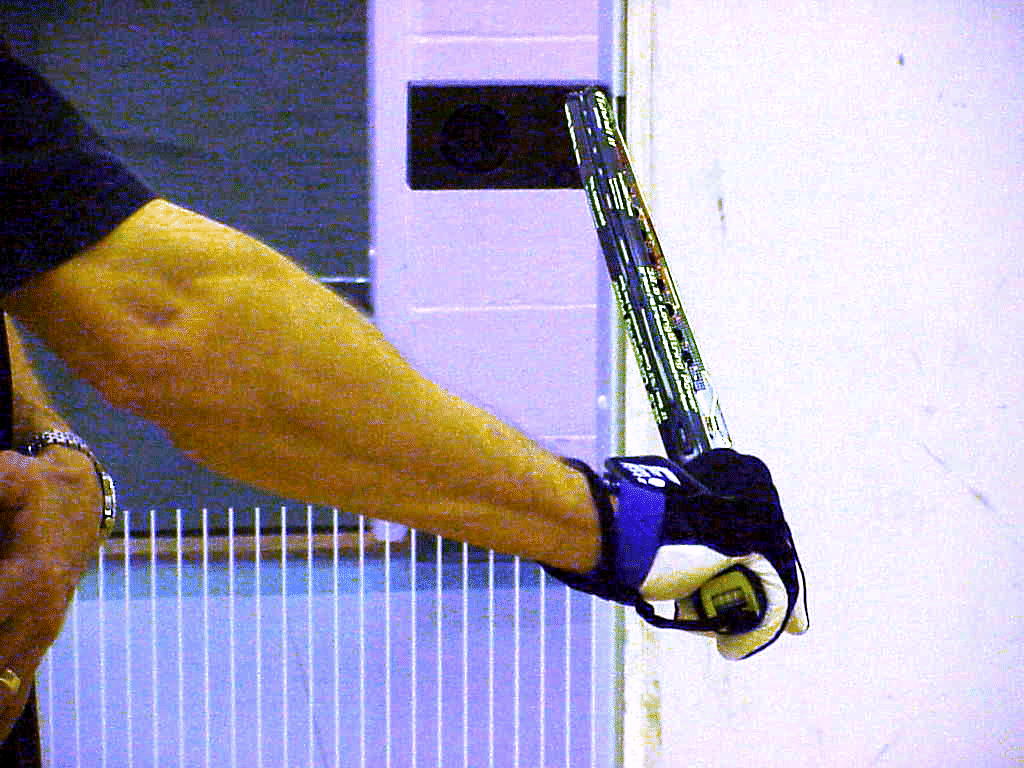
Rotate the racquet until it is tilted slightly toward you at the top (about two to four inches from truly parallel). Now snap your wrist so that the racquet is pointing at the side wall. This is how the racquet meets the ball. The racquet should be perpendicular to the floor, not tilted back or forward. This is the forehand grip. Remember to keep your grip loose and relaxed.
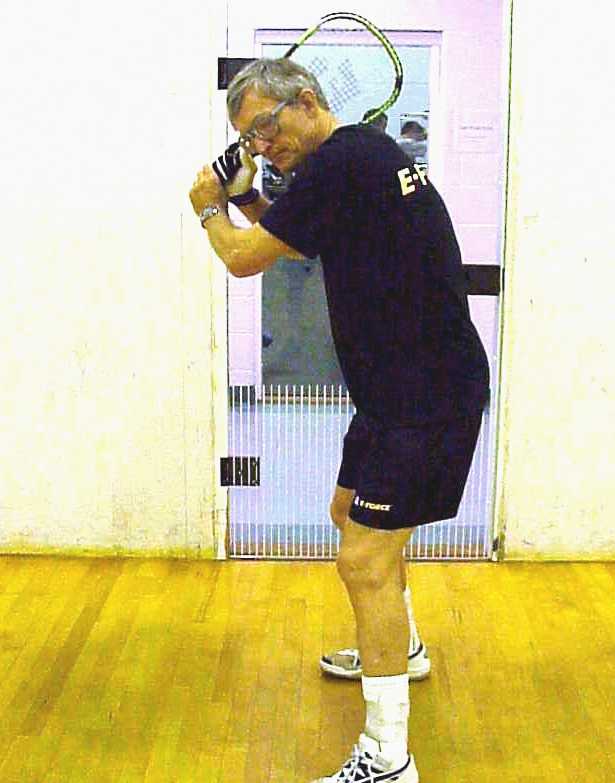
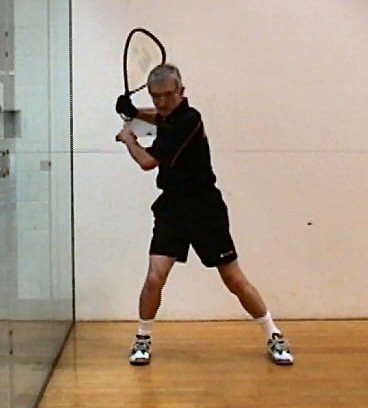
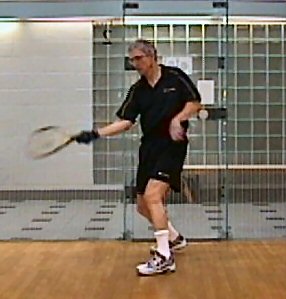
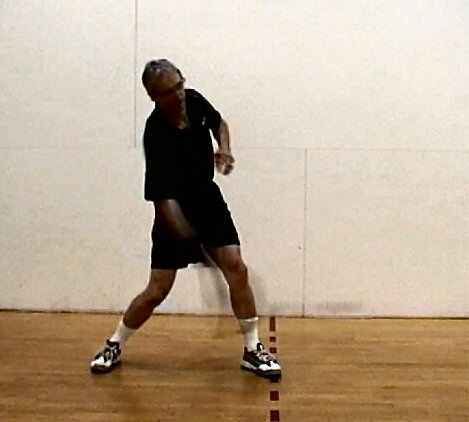
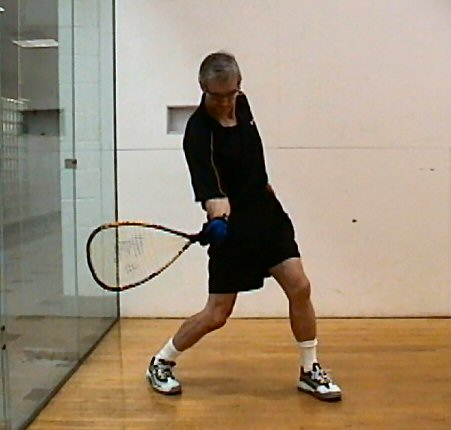
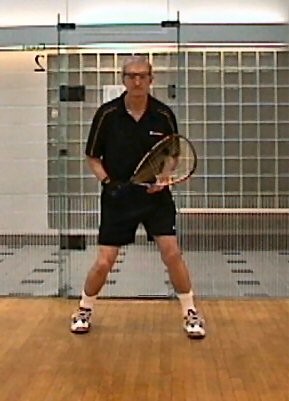
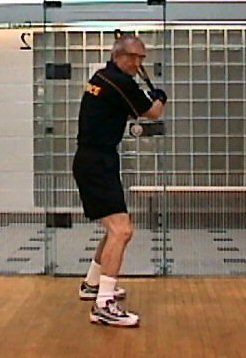
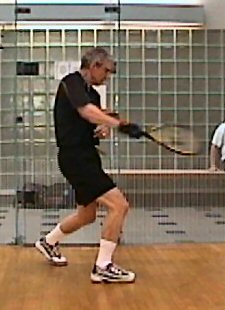
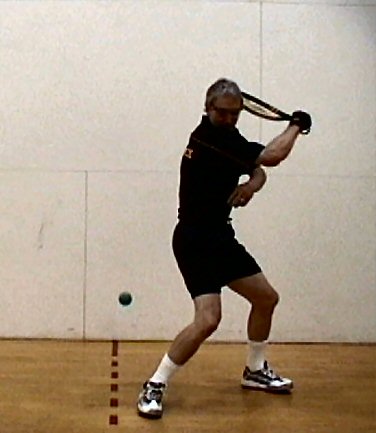
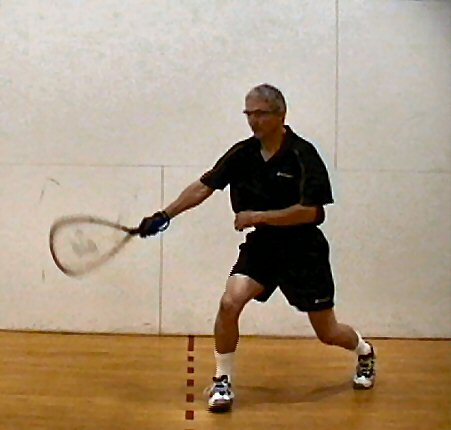
Assume the ready position again, this time with one hand on the racquet. The left hand should be just below the racquet handle, almost as if you were holding a baseball bat in two hands. Notice that your right wrist is cocked and your right elbow is up, about level with your shoulder, and away from your body. Your hands should be just below your shoulder and back slightly behind your rear foot. Keep your hands close to, almost touching, the shoulder. (In baseball this is called "hiding your hands" from the pitcher.) Your shoulders should be level and pointed toward the front wall.
Your stance should be slightly closed with your left foot in front of and a few inches closer to the side wall than the back foot. The feet should be slightly wider than shoulder width. Bend your front knee in toward your back leg. This shifts your weight back. At least 60 percent of your weight should be on the back leg. The front leg is bent in and the back leg is also bent slightly so that the knees are pinched in toward each other. Your chin should be close to, even touching, your front shoulder.
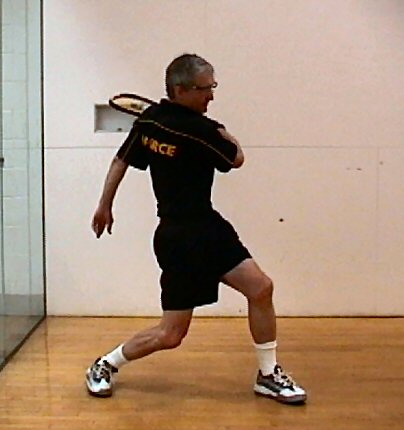
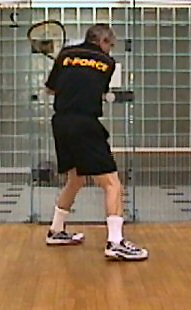
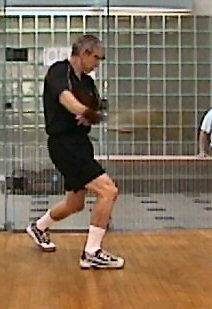
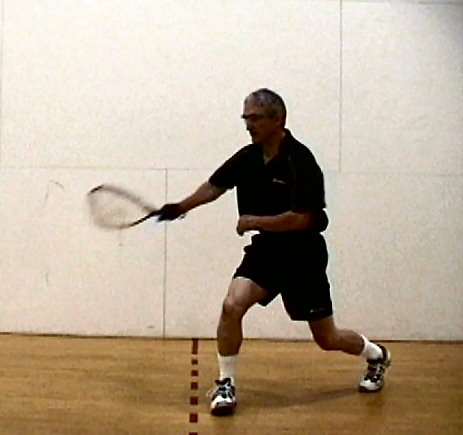
Rotate your shoulders back so that your chest is facing the back wall. Take a short stride, approximately four inches, diagonally toward the right hand front corner. Don’t over-stride. The purpose of the stride is to transfer more weight to your back leg until you start your swing. Keep the front knee in. This keeps your weight and hands back so that you can "throw the head of the racquet at the ball." The stride should be slow and controlled. The stride should precede the swing. There should be a distinct stride phase and then a distinct swing phase.
Your hands and arms should be relaxed. The looser you grip the racquet, the more power you can transmit through it. Don’t worry about losing your grip. Your grip will tighten automatically as you contact the ball. The left forearm is parallel to the ground.
Your belt buckle and knees face the side wall until it is time to
swing
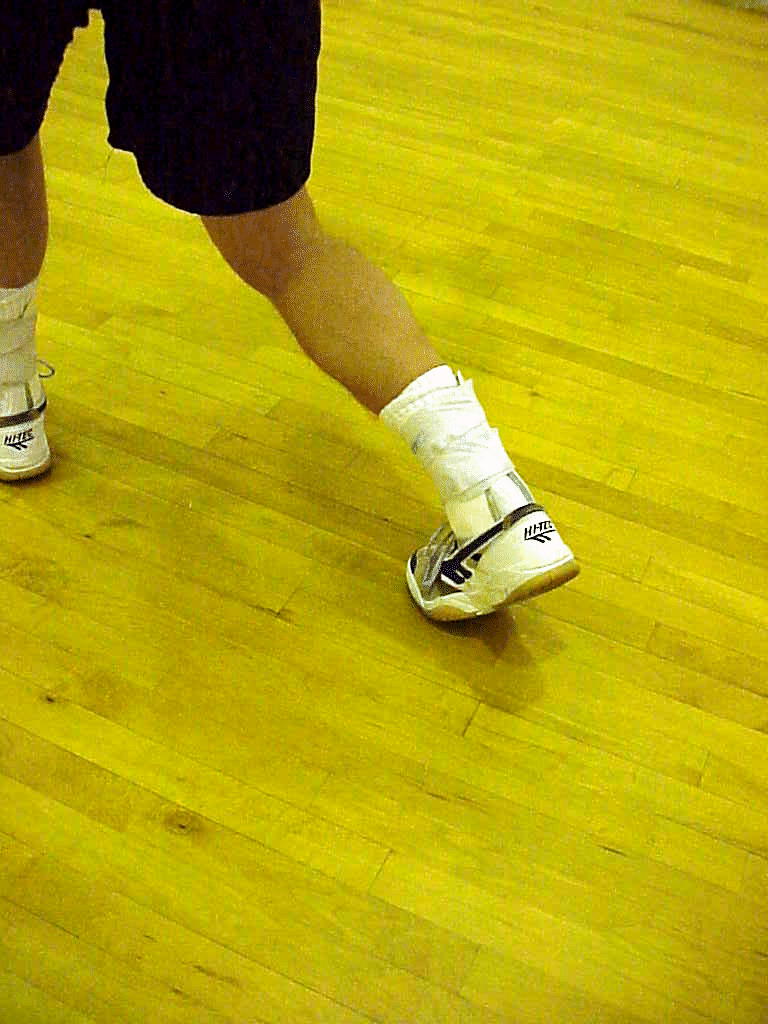
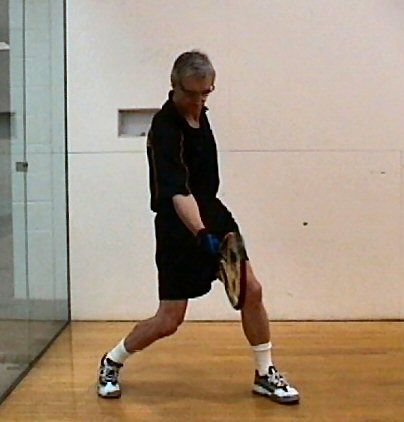
at the ball. The first thing that moves is your back knee, which moves
forward toward your front knee as you push off your back foot. Your
back
foot pivots on the ball of the foot with the heel of the foot off the
ground When this happens, you will notice that your hips have started
to
rotate, your elbow and shoulder are lower, and the butt of the racquet
is facing the front wall, even though you haven't
moved your arm.
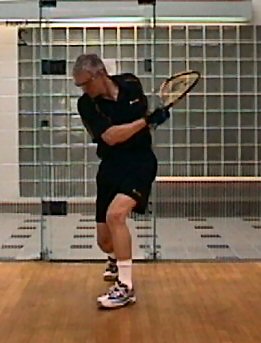
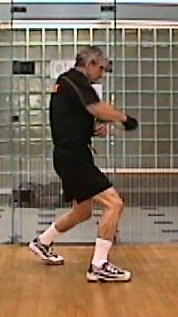
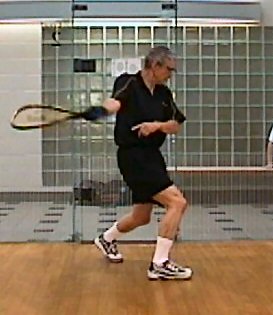
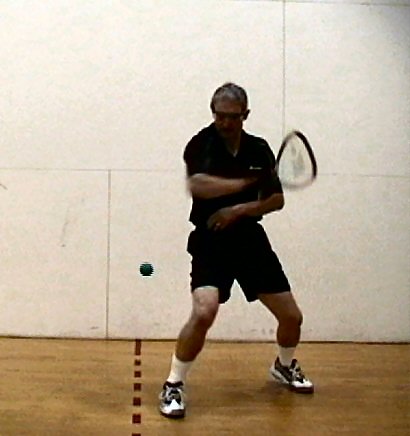
Continue the rotation of your hips, then your torso, and finally
your
shoulders. Use the muscles of your torso to pull your trailing
shoulder down and around. Your left arm acts as if you are pushing
someone out of the way. The right elbow leads the racquet. The forearm
and upper arm
form an "L." Keep your elbow close to your body (in the
slot). This is the compact
stroke.
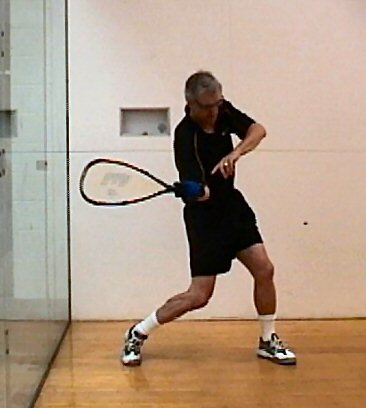
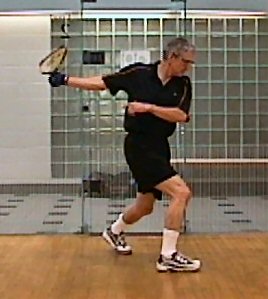
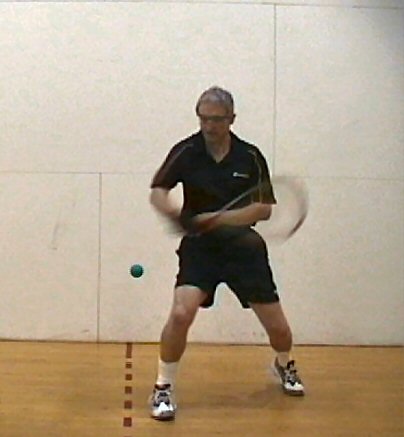
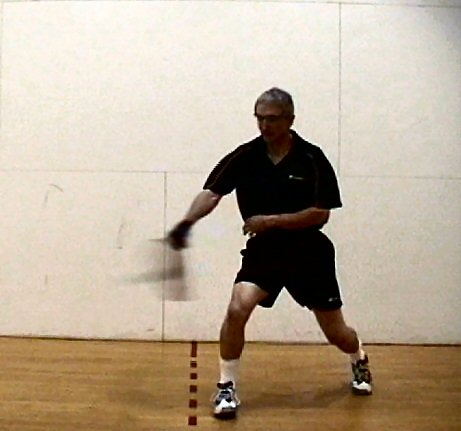
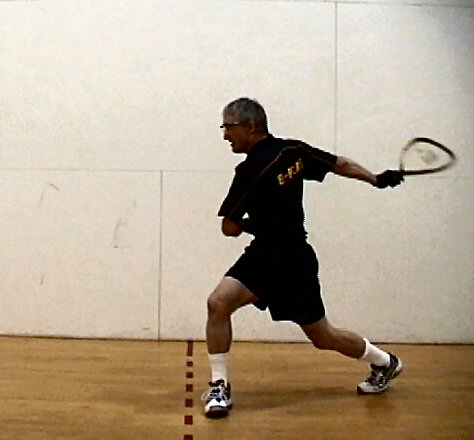
As your shoulders start to rotate, begin flexing the wrist, moving the top of the racquet toward the ball. Make contact with the ball off the front foot. The elbow, wrist, hand, racquet, and ball should be in a straight line when the ball is hit. Once the ball is contacted, allow your momentum to continue and follow through. When your swing is complete your knees and belt buckle are all facing the front wall. Your left arm should be behind you. Your racquet is well back on your left side, at or below your shoulder.
As you push off the back foot, the hips, knees, and shoulders turn toward the front wall, and the back leg pivots on the ball of the back foot. Baseball instructors say that you "squish the bug" with the back foot. The heel of the back foot is lifted off the floor.
If you are dragging your back foot after making contact with the
ball, you have shifted too much weight to the front foot. Drop your
butt
slightly, so that you put more weight on your back leg. You should be
leaning back after you have completed your
swing. Keep your weight back.
Keep your head still throughout the swing. You should pretend your
head
is in a vise and can't move. This takes discipline because the rest
of your body is in motion. If you are holding your head still, you
should
feel the back shoulder contact your chin at the end of the swing. After
you hit the ball, don't immediately follow the ball by turning your
head.
Instead, hold your head steady and follow the ball only with your eyes
until it hits the front wall

Notice that when the wrist flexes the motion is similar to hitting a nail sideways into a wall with a hammer. Many players flex their wrist with the palm of the hand facing the front wall in a slapping motion. This is less powerful than leading with the bottom of your fist. Also, make sure that the when the racquet strikes the ball that the racquet face is perpendicular to the floor, so that you are not hitting over the top or slicing under the ball.
Your muscles pull the racquet through the
ball.
Don’t try to push the racquet through the ball.
Drill.
The basic racquetball drill for stroke mechanics is the drop and hit. Go to the short line on the forehand side. Stand about six feet away facing the near side wall. Drop the ball out and away from your body so that it bounces about at the midpoint of your front foot. Don’t jam yourself. Don’t throw the ball against the wall. Just drop it so it rebounds even with the front foot and hit it. Be in the ready position with your racquet up as you drop the ball. If you have trouble with the timing of the drop, just let the ball bounce more than once. Using the correct mechanics outlined above, hit the ball straight toward the front wall. If done correctly you should execute a down the line shot. Hit five good down the line shots. A good shot travels the length of the court without contacting the side wall and bounces twice before hitting the rear wall.
It is good practice, once you have hit the ball, to relocate
to good center court position and assume the athletic position facing
the front wall with knees bent and racquet horizontol across your waist.
Now drop the ball a few inches forward, more toward the toes of the front foot. Hit five good cross court passes which go to the backhand corner, bouncing twice before hitting the rear wall.
Finally, drop the ball a little further back, toward the heel of your front foot. Hit five good pinches. A good pinch shot contacts the near side wall within five feet of the front wall, then the front wall, and bounces twice before hitting the other side wall. The secret to hitting a good pinch is to wait until the ball drops below knee level.
Go to the dotted line and repeat. Go to the halfway point between the rear wall and the dotted line and repeat. Finally, go to deep court, just in front of the back wall and repeat once more, except that you shouldn't practice pinch shots from deep court because you shouldn't hit pinch shots from deep court (very low percentage).
The more you practice the better you get. Practice more, play less, play better.
Power.
Once you have practiced the forehand you can concentrate on increasing your power. Power comes primarily from bat speed. To increase your power, be sure to keep your stance closed, rotate your shoulders so that your chest faces the back wall. Keep your grip loose, your arm relaxed, and your wrist cocked. Start your wrist snap as soon as your shoulders begin rotating toward the ball. Vssualize hitting the ball at the top of the racquet. This increases the length of the lever. Finally, keep your butt low so that your weight is back.
Control.
Visualize the shot before you shoot. Use the good stroke mechanics
to generate a flat swing. Make sure that
your arm and racquet are horizontal with the racquet face parallel to
the target when you hit the ball. Keep your head steady. Focus on the
ball. The longer you keep your eye on the ball, the more control
you will have over your shots.
Backhand.
Now you are batting lefty. Again, grab the racquet in two hands as if it was a baseball bat. Pretend the pitcher is the front wall and you are at home plate. You should automatically turn sideways and face the backhand side wall.
Take a few practice swings as if you are getting ready for the pitch. Take one super slow swing and note that when you start your swing, the butt of the racquet faces the front wall. Freeze your super slow stroke with the racquet butt facing the font wall. Look at your hands. They should again be in a palm up, palm down position.
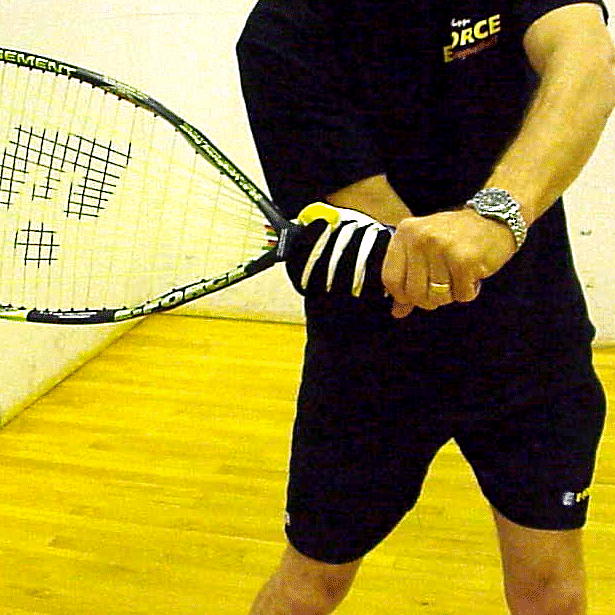
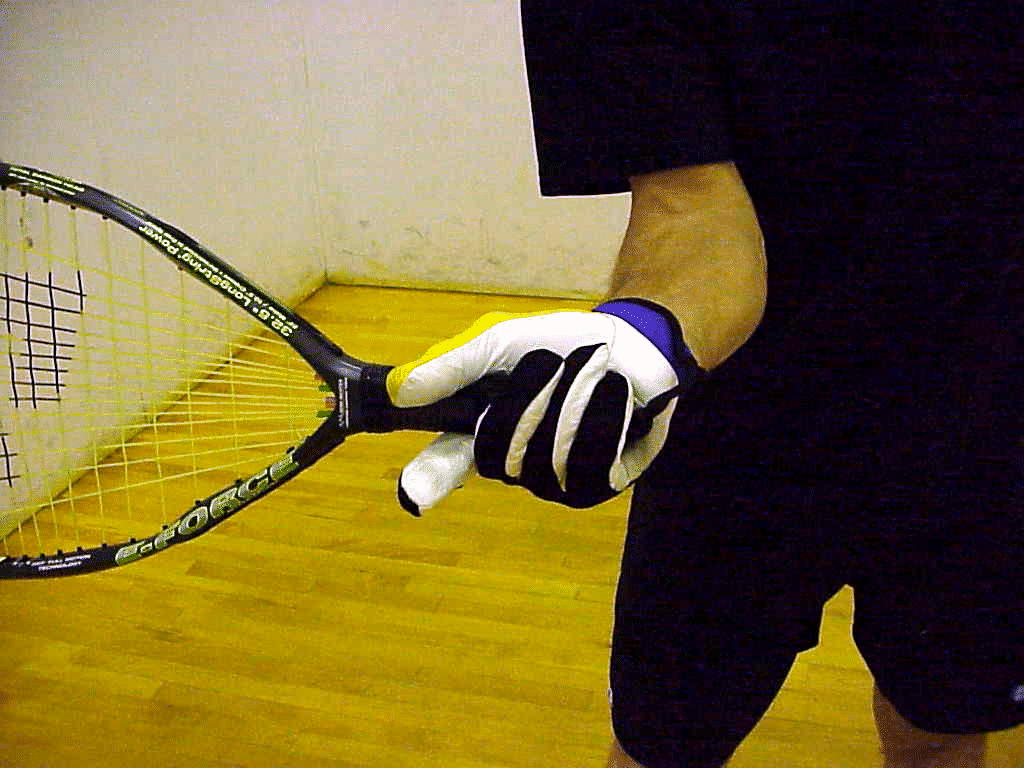
Now take your left hand off the racquet. Extend your trigger finger slightly and also extend your thumb slightly, just as in the forehand grip. Note that if you look at your right hand, all you can see is the back. You should be able to read the name brand of your glove. Rotate the racquet in your hand so that it is approximately parallel to the side wall when your elbow is facing the front wall. Again, the racquet should not be exactly parallel to the side wall, but tilted slightly (two to four inches) toward you. Note that your wrist is cocked back slightly (exactly the same as it was in the forehand, but now the palm is down).
To make sure that you have the right grip, extend your arm and snap your wrist so that the racquet is pointing at the side wall. The racquet should be perpendicular to the floor, not tilted up or down. This is how the racquet meets the ball.


If you are used to the familiar "shake hands with the racquet and
then
give it a 1/8 turn for the backhand" instruction, this grip might be
slightly
over-rotated compared to what you are used to. However, give it a try.
It should increase both power and control.
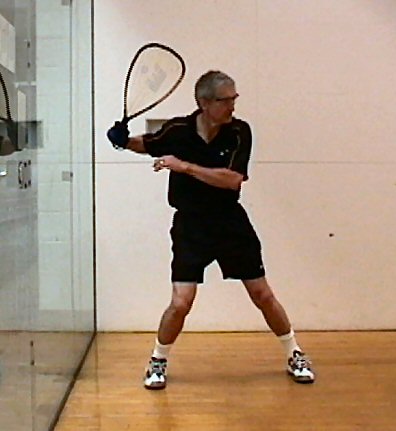
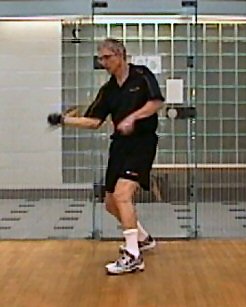
The rest of the swing is almost a mirror image of the forehand. The only reason that it is not a complete mirror image is that you have only one hand on the racquet. The ready position is almost the same. The right elbow is again up, approximately shoulder high, and away from the body. However it is the lead elbow now. Your wrist is cocked, pulling the head of the racquet back. Put the left hand under your right hand in the ready position, similar to the baseball player waiting for a pitch. This helps keep the racquet up, however, as you swing, the left arm must drop and be kept close to the body as if you are hugging yourself. The left arm is the lead arm when batting lefty, so keep the left elbow in the slot on the backhand.
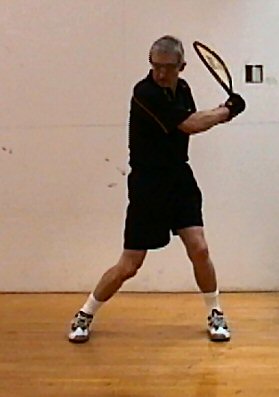
The knees are pinched in and the weight is back so that at least 60 percent of your weight is on the back leg. Your stance should be slightly closed with the front foot a few inches closer to the side wall than the rear foot. Your shoulders should be level. You should feel your chin touching your front shoulder.
Rotate your shoulders back so that your chest is facing the back
wall. Take a small, four-inch step toward
the front wall.
Keep the stride phase and the swing phase separate and distinct. Slow
stride,
quick racquet. Begin the swing by pushing off the rear foot,
forcing
your back knee forward. Your rear foot twists on the ball of the foot
as
you "squish the bug." Forcing the back knee forward starts the hip
rotation, which leads to
rotation
of the torso and eventually the shoulders. Even without moving your
arm, you will find that your
left elbow and shoulder are lower, with the butt of the racquet facing
the target,
beginning the flat stroke in which your forearm
and racquet are horizontal.
The right hand is the top hand in the
backhand, so
your right elbow is away from the body, leading the racquet.. As your
shoulders begin to
rotate, straighten your arm and flex your wrist,
throwing the head of the racquet at the ball.
Just as in the forehand,
you want to contact the ball off the front
foot. Your racquet is horizontal with the face perpendicular to the
floor as you contact the ball. Utilize your hip, torso, and shoulder
rotation to pull the
racquet
through the ball. The knees and belt
buckle
start facing the side wall and end up facing the front wall.
Keep your
arm, wrist, and grip loose so that the maximum power is transmitted to
the racquet head. Keep the swing flat and level. The follow
through should end up at or below shoulder height. Note that in the
baseball swing, the front hand guides the bat while
the top hand does most of the snapping. Since you are now batting lefty
and one-handed, the only hand you have on the racquet is the front, or
guiding hand. Therefore, you cannot generate as strong a wrist snap on
the backhand side. This is one reason that the backhand tends to be
weaker
than the forehand. Keep your arm and hand nicely
relaxed
and flex your wrist as much as possible. The
result
should
be a backhand that is only slightly less powerful than the forehand.
Once you have made contact with the ball, continue the swing,
following
through level so that the racquet finishes up behind you, below
shoulder
level. Keep your head still. Because your left hand is down, you won't
feel your back shoulder brush against your chin, however, if your head
is still, your chin and back shoulder should be only a few inches apart
as you follow through. Follow the ball with your eyes, not your head.
Again,
if you are dragging your back foot (which has just finished squishing
the
bug), you are putting too much weight on the front foot. Lower your
butt. Keep your
weight back.
The power, control, and drill instructions are identical to the forehand stroke. Power comes from taking a complete swing. Before starting your swing, rotate your shoulders so that your chest faces the back wall. Start your wrist snap as soon as your shoulders begin rotating toward the ball. Hit the ball with the top of the racquet. Pull the racquet quickly around and through the ball. Control comes from keeping your eye on the ball as long as possible, visualizing contacting the ball with the face of the racquet pointed toward where you want the ball to go, and keeping your head steady.
Hitting the ball inside-out
The stroke mechanics outlined above assume that when you contact the
ball, your hand, the racquet, and the ball will be lined up. That is,
your forearm, hand, racquet handle, racquet face, and ball will all
form a
straight line as you look at the ball. Many baseball players, looking
to delay contact with the ball as long as possible, so as to gain time
to get
a good look at the ball, will hit with an inside-out swing. The only
difference between this approach and the stroke mechanics
outlined above is that the hand is in front of the ball when the ball
is contacted. This leads to balls hit to right field for right-handed
batters, rather than straight away or pulled to left. You lose some
power, but it is an
effective method of hitting for singles and is frequently used when the
batter has
two strikes.
You can visualize the inside-out stroke as "throwing the hands at
the ball," instead of throwing the top of the racquet at the ball.
Another way to visualize it is to "pull the butt of the racquet"
through the ball. To hit inside-out, keep the wrist cocked until the
butt of the racquet is in front of the ball, then snap your wrist at
the last moment. (In the standard stroke, you start throwing the head
of the racquet as soon as your shoulders start rotating.) You will not
have as much power as in the standard stroke, but the loss of power
will not be dramatic. The path of the ball will be different from that
taken by the standard stroke, depending on the relative position of the
ball, racquet, hand, etc. You can still hit all the usual shots (DTL,
CC, WA, pinch, reverse pinch) but with a little less power. The ball
will also have sidespin, rotating clockwise when viewed from above.
You can give it more spin by "dragging" the face of the racquet across
the ball. This means that, for example on the forehand side, a CC pass
will have
slightly wider angle while a DTL will tend to stay a little further
away from the side wall than if hit with the usual stroke.
I can think of four situations that might call for an inside-out
swing. The first is during the serve. Hitting the serve inside-out
changes the path of the ball because of the sidespin and it changes the
pace of the ball. It could throw the receiver's positioning and timing
off.
See the section on serves. Another
reason is to "take something off" the hit. If you look like you are
going to crush the ball and then hit it inside out, it could change the
momentum of the rally. The inside-out stroke is tailor-made to hit a
pinch, although I don't recommend changing your stroke mechanics for
different shots. Finally, suppose the ball is too deep into your stance
to hit
with the usual mechanics. This is exactly like a batter who is trying
to catch up to a fastball. In this case hitting inside-out is just what
the doctor ordered.
Bottom line: use the inside-out stroke sparingly.
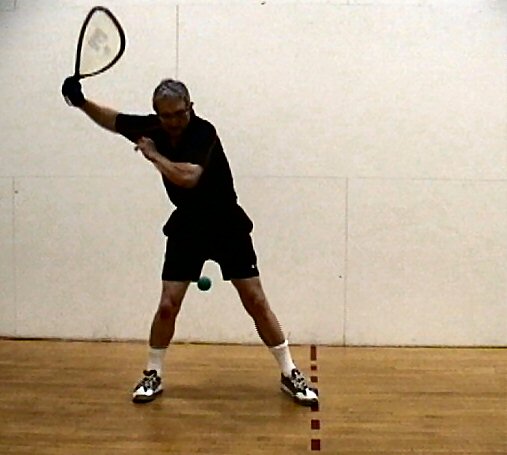
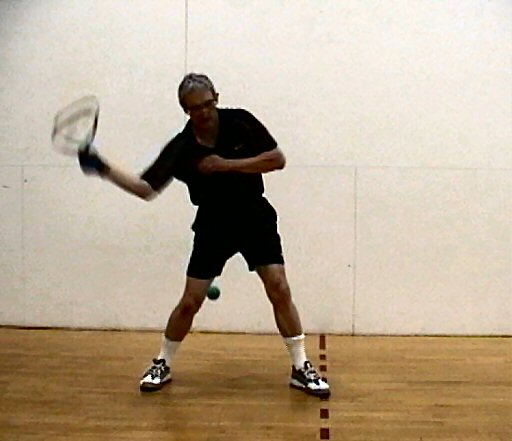
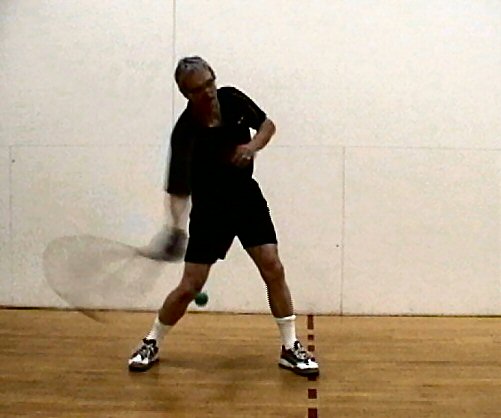
Hitting the pendulum stroke
The pendulum stroke was very popular during racquetball's heyday in the
1980's. Its most famous advocate is Marty Hogan. In this stroke, your
torso is more horizontal. You are slightly bent at the waist. From this
crouch, rotate your torso so that
your shoulders are facing the back wall. Raise your hitting arm so that
your racquet is above your head, with your elbow bent and your
wrist cocked.The nonhitting arm is also raised, with the hand near the
butt of the racquet. Rotating your hips, torso, shoulders, arms, wrist,
and racquet
powers the head of the racquet through the ball. Contact the ball deep
in the stance, near the rear foot. Follow through with the racquet
high, well above the shoulder. Power is generated by the rotation of
the upper body and flexing the wrist.
The main difference between the pendulum stroke and the flat stroke
is that the circle described by the head of the racquet is almost
horizontal in the flat stroke and almost vertical for the pendulum
stroke.
The primary disadvantage of the pendulum stroke comes from its
vertical path. If you hit the ball a little late in your stance, while
the racquet is still going down, you will hit the ball into the floor.
If you hit the ball a little too early in your stance, while the
racquet is rising, you will hit the ball too high. Only when the
racquet is approximately perpendicular to the floor will you hit the
ball directly to the front wall. However, the racquet is approximately
perpendicular only in a range of about 12 inches. This is a
small window of opportunity. With the flat stroke, hitting the ball
deep in the stance results in the ball hitting the side wall,
generating a pinch shot. Hitting with the racquet parallel to the front
wall generates a down the line shot. Hitting early in the stance leads
to a cross-court or reverse pinch shot. The window of opportunity
for the flat stroke is approximately 36 inches, about three times
larger than the pendulum stroke.
The primary advantage of the pendulum stroke is that it allows you
to hit the ball with power deep in your stance. This is helpful if the
ball is travelling very fast and you have to catch up to the ball.
However, this advantage is offset in the
flat stroke by early racquet preparation. That is, by raising your
racquet early, you are ready to start the forward rotation of your body
before the ball arrives. See the section on early racquet preparation for
more on this subject. Also, you can hit inside-out if you have to hit
the ball deep in your stance.
As far as I know, all racquetball instructors recommend the flat
stroke.
One way to see if you are executing the stroke properly is to
observe whether your follow-through is above or below your shoulder. If
it is above your shoulder, you have too much pendulum in your stroke.
Flatten your stroke out, make sure your arm and racquet are horizontal
on
contact, and finish with your racquet at or below shoulder level.
Further Reading
Here is a nice animated gif, courtesy of Ed Arias http://www.racquetballcentral.com/,
showing Cliff Swain hitting a forehand serve. http://www.surfermall.com/rball/cliff.gif
Here is an excellent discussion of the physics of hitting a ball. http://carini.physics.indiana.edu/E105S99/swing.html
The pendulum stroke is described in Ed Turner and Marty
Hogan, Skills and Strategies
for Winning Racquetball, Leisure Press, 1988.
My thinking on stroke mechanics has been heavily influenced by the
writings of Jack Mankin.
Another good website on baseball swing mechanics is the Online Hitting Academy.